Apple Pie Filling: Homemade, Firm Slices, Bake, Freeze or Can
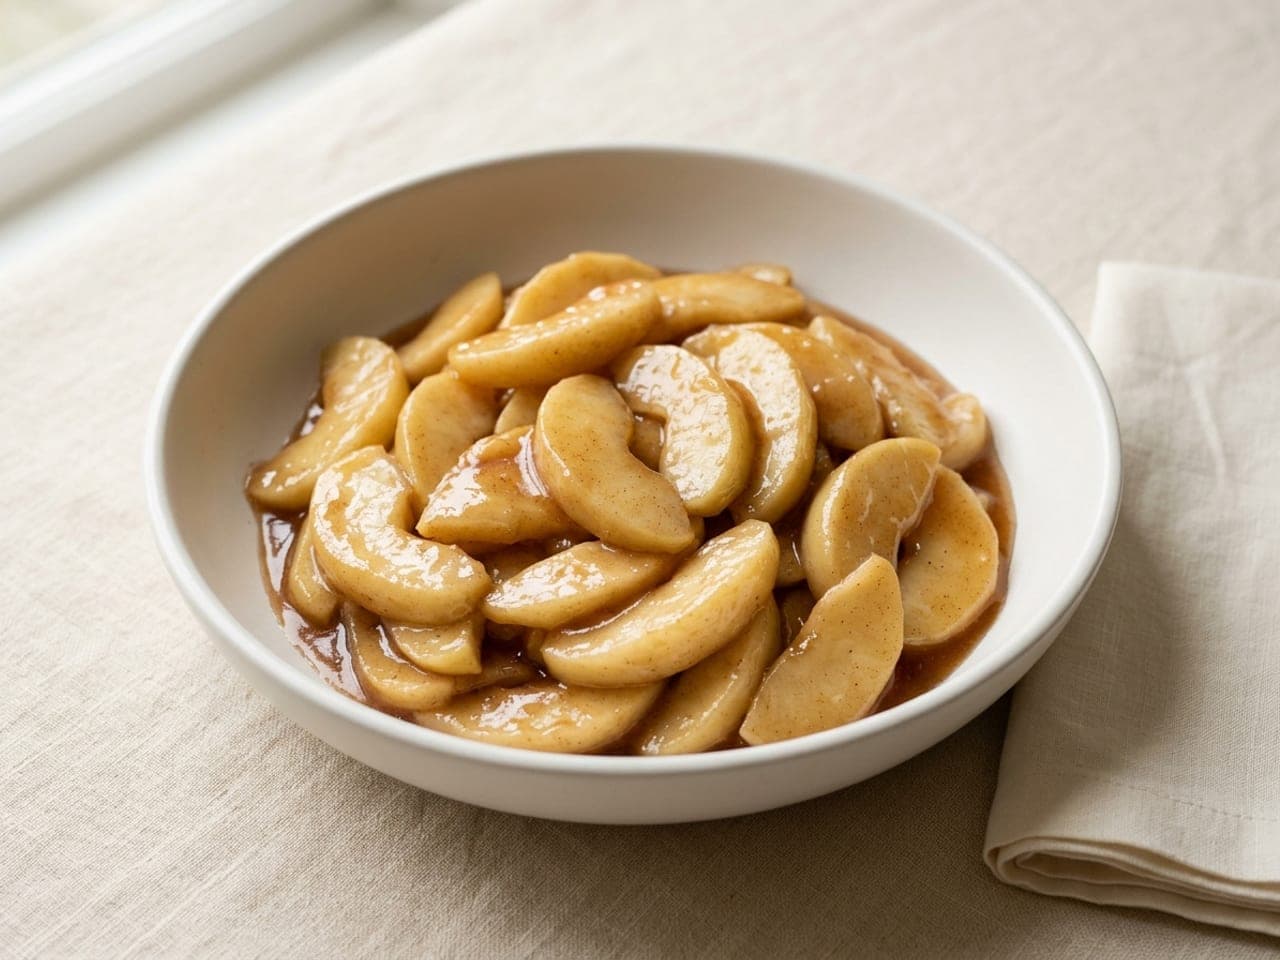
A homemade apple pie filling cooked on the stovetop so the slices hold their shape: 3 1/2 lb (1.6 kg) of firm apples cut 1/2 inch (1.25 cm) thick, held gently at 140 to 160°F (60 to 71°C) so the fruit firms itself up, then the juices reduced and set with a measured spoonful of starch. One batch makes 4 to 4 1/2 cups (1 to 1.1 litres), which fills one standard 9-inch (23 cm) pie, and it keeps, so the pie can be assembled days later. The page chooses the thickener by what you will do next (bake this week, freeze, or can), names the best apples on both sides of the Atlantic with measured acidity and firmness, says exactly how much filling a pie takes, and plates the filling three ways beyond the slice.
Ingredients
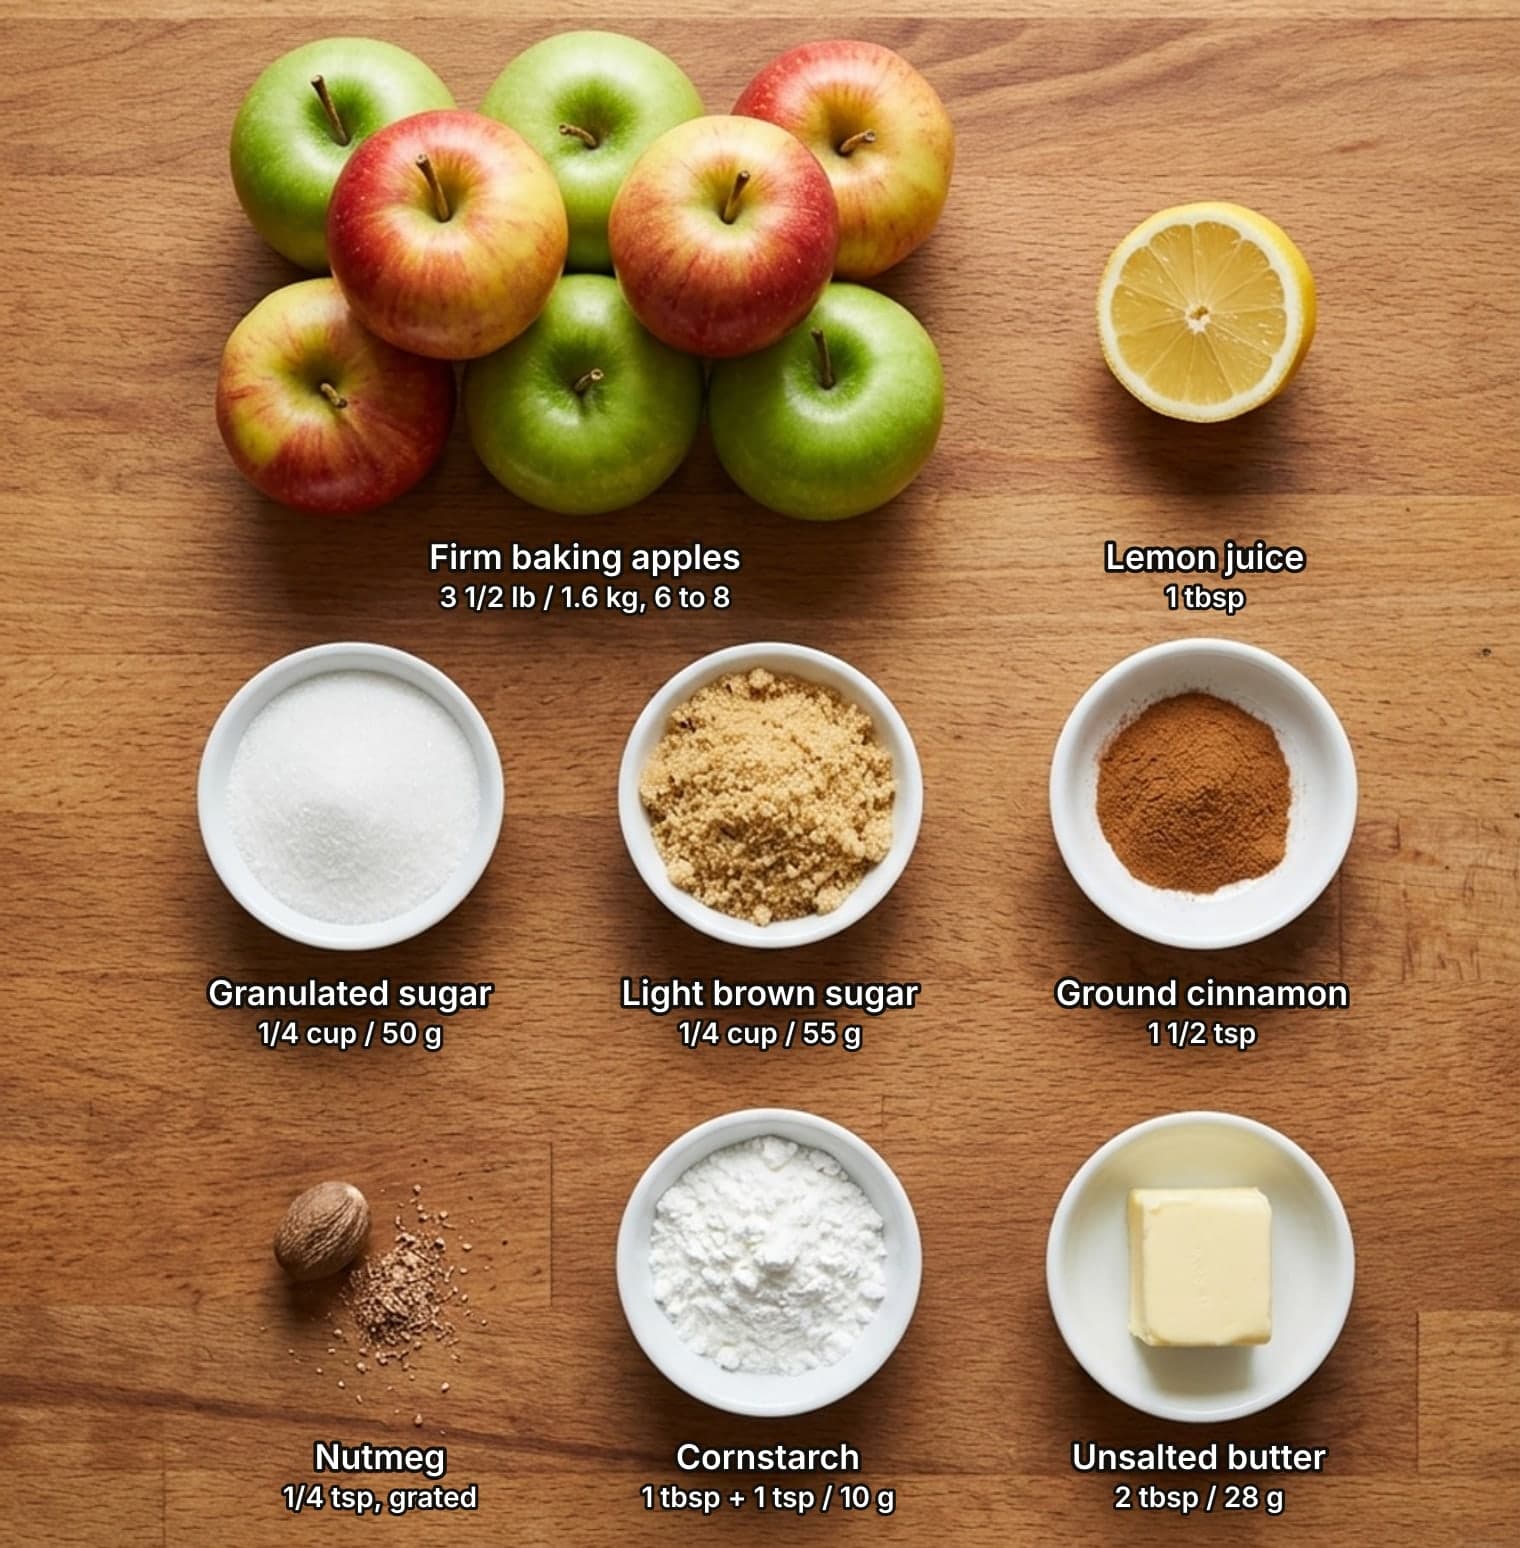
- firm baking apples, peeled, cored and cut into wedges 1/2 inch (1.25 cm) thick at the widest point, which gives about 2 1/4 lb (1 kg) of slices. US: half Granny Smith and half Golden Delicious or Braeburn, or all Pink Lady. Europe: Boskoop with Braeburn or, in autumn, Jonagold3 1/2 lb (1.6 kg), about 6 to 8 apples
- fresh lemon juice (about half a lemon)1 tbsp
- granulated sugar (white caster or granulated sugar in the UK)1/4 cup (50 g)
- light brown sugar, packed (light soft brown sugar). All granulated sugar also works; the flavor is cleaner and less caramel1/4 cup (55 g)
- ground cinnamon. Use 1 tsp if the filling will sit beside savory food1 1/2 tsp
- freshly grated nutmeg1/4 tsp
- fine salt1/4 tsp
- cornstarch (cornflour in the UK), for a filling you will bake or eat within a few days. For the freezer, use 2 1/2 tbsp (about 16 g) tapioca starch instead. Not for canning: see the safety notes1 tbsp + 1 tsp (about 10 g)
- cold water, to dissolve the starch2 tbsp
- unsalted butter (milk), optional, stirred in off the heat. Leave it out for a dairy-free, vegan filling2 tbsp (28 g)
Choose the thickener by what happens next: bake, freeze or can
Most recipes for apple pie filling give you one cornstarch slurry and stop. That is the right answer for exactly one situation. The starch that works depends on what the filling will go through after it leaves the pot, and the three common plans need three different starches.
Baking or eating it within a few days: cornstarch. It is cheap, it is in every kitchen, and apples need less of it than any other pie fruit, because they are less juicy and naturally high in pectin. King Arthur Baking’s thickener chart gives 1/2 tsp of cornstarch per cup (240 ml) of sliced apples, or 1 tbsp plus 1 tsp for a 9-inch (23 cm) pie. This recipe uses that same 1 tbsp plus 1 tsp, about 10 g, for 2 1/4 lb (1 kg) of prepared slices, which is about 1% of the apple weight. It can be that low because the juices are reduced first. If you prefer flour, the same chart gives roughly three and a half times the cornstarch amount, and the result is cloudier with a faint floury taste. Flour must be boiled with the filling just like the cornstarch; never stir raw flour into a filling off the heat.
Freezing it: tapioca starch (often sold as tapioca flour) or Instant ClearJel. Penn State Extension is direct about why: “Freezing causes liquids thickened with flour or cornstarch to shear or separate.” A cornstarch gel tightens as it sits cold and squeezes water back out, and freezing and thawing makes that much worse, so the thawed filling sits in a puddle. Tapioca holds on to its water. Use 2 1/2 tbsp of tapioca starch, about 16 g, for this batch, which is 1.6% of the apple weight and in line with the dose pastry chef Stella Parks uses in her apple pie. Instant ClearJel, a modified starch that thickens without cooking, also freezes well; King Arthur’s dose is the same as for cornstarch, 1 tbsp plus 1 tsp for a pie. If you use it, hold back 1 tbsp of the granulated sugar in step 2, mix the Instant ClearJel into it so it does not clump, and sprinkle it over the filling while folding, once the pot is off the heat.
Canning it: cook-type Clear Jel, and nothing else. Clear Jel (the trade spelling is Clearjel) is a modified waxy maize starch that home-canning guidance specifies for fruit pie fillings. It is rarely on supermarket shelves on either side of the Atlantic and is usually bought online or from canning suppliers. The two versions of the product are mirror images: cook-type is for canning and not recommended for freezing, and instant is for the freezer and not for canning. Canning also needs its own recipe, with far more starch and added liquid than a stovetop filling, so it is covered separately below.
Two more points apply whichever starch you pick. First, starch is the last line of defense, not the first. In his testing for Serious Eats, J. Kenji López-Alt found that doubling the cornstarch in a runny pie “works, but you end up with a goop-to-apple-chunk ratio that’s way off base”; cooking the juices down was the better fix. Second, sugar and acid both get in the way of starch, so in a sweet, tart syrup the slurry needs a real, visible bubble for a full minute. Warm is not enough.
How to make Apple Pie Filling
- Peel, core and cut the apples 1/2 inch (1.25 cm) thick. Peel and core the 3 1/2 lb (1.6 kg) of apples and cut them into wedges 1/2 inch (1.25 cm) thick at the widest point, dropping them into a large bowl with the 1 tbsp lemon juice and tossing as you go. You should end up with about 2 1/4 lb (1 kg) of slices, which is 8 to 10 cups (1.9 to 2.4 litres) depending on how tightly they pack. Why this matters: a filling that gets stirred in a pot needs a slice with some body. Thin 1/4 inch (6 mm) slices pack tighter in a raw pie but snap when you stir them, while 1/2 inch (1.25 cm) wedges survive the pot and still cook through in the oven. Keep the thickness even, because one thin slice turns to sauce while a thick one is still firm. The lemon is there for flavor and for the few minutes between knife and heat; the gentle cooking that follows slows browning on its own.
- Toss with sugar, spice and salt, and let the juice start. Tip the slices into a wide, heavy pot or Dutch oven (a heavy lidded casserole). Add the 1/4 cup (50 g) granulated sugar, the 1/4 cup (55 g) packed light brown sugar, the 1 1/2 tsp cinnamon, the 1/4 tsp nutmeg and the 1/4 tsp fine salt, and fold until every slice is coated. Leave it for 10 to 15 minutes, until a shallow pool of syrup has formed at the bottom. Why this matters: sugar pulls a little juice out of the cut surfaces, and that liquid is what carries heat evenly around the slices in the next step and gives your thermometer something to read. The sugar here is modest on purpose, about 10% of the weight of the prepared apples, because the juices are going to be concentrated rather than diluted.
- Hold the apples at 140 to 160°F (60 to 71°C) for 15 to 20 minutes. Set the pot over low heat and warm the apples slowly, folding them gently from the bottom almost constantly while they warm, so the slices on the base do not overheat before the ones on top are warm. Check the temperature in the juices and in the middle of the pile with an instant-read thermometer. Once it reaches 140°F (60°C), cover the pot and keep it between 140 and 160°F (60 to 71°C) for at least 10 minutes and ideally 15 to 20, lifting the lid to fold every minute or so and sliding the pot off the heat for a minute whenever it climbs toward the top of the range. It must not simmer yet. Why this matters: this is the step that keeps the slices whole. In this temperature window an enzyme in the apple itself firms up the pectin that glues its cells together, so the fruit can take a hard boil and an hour in the oven afterwards without collapsing. Rush past 160°F (71°C) too early and the enzyme is destroyed before it has done its work. No thermometer? See the section on the gentle hold for the boiling-water method.
- Turn up the heat and reduce the juices. Take the lid off and raise the heat to medium-high. Cook for 8 to 10 minutes, folding gently with a heatproof spatula, until the juices have gone from thin and watery to a glossy syrup and a spatula dragged across the bottom of the pot leaves a trail that closes slowly. The slices should bend without breaking and still have a firm center. Why this matters: watery pie comes from juice that had nowhere to go. Boiling it off now, in an open pot, concentrates the apple flavor and means the starch only has to set a small amount of syrup instead of a flood. The apples can take this heat because their pectin is already set. Fold, do not stir hard: the slices are sturdy but not indestructible.
- Thicken with the starch that suits your plan. For a filling you will bake or eat within a few days, stir the 1 tbsp plus 1 tsp cornstarch (cornflour in the UK) into the 2 tbsp cold water until smooth, pour it over the bubbling apples and fold for 1 full minute at a visible bubble, until the syrup turns from cloudy to glossy and clings to the slices. Why this matters: starch only thickens once its granules have swollen, and in a sugary, acidic syrup that takes more heat than it does in plain water, so a slurry that never reaches a bubble stays thin and tastes chalky. If the filling is going into the freezer, use 2 1/2 tbsp tapioca starch in place of the cornstarch, mixed with the same water and cooked the same way; cornstarch weeps after freezing. If you want jars on a shelf, stop here: this recipe is not for canning. See the thickener section for all three routes.
- Finish with butter off the heat. Take the pot off the heat and fold in the 2 tbsp butter, if you are using it, until it disappears into the syrup. Taste a slice: add a pinch more salt if it tastes flat or a few drops of lemon juice if it tastes only sweet. Why this matters: butter stirred in at the end stays as a glossy emulsion in the syrup and rounds off the acidity, where butter fried at the start just coats the pot. It is optional. Leave it out for a dairy-free, vegan filling.
- Cool it fast in a single layer. Scrape the filling and every bit of syrup onto a rimmed baking sheet (a baking tray with a lip) and spread it into a single layer. Leave it until it is completely cool to the touch, 30 minutes to 1 hour, then use it or move it to the fridge. Do not leave it out for more than 2 hours in total, or 1 hour if the kitchen is hotter than 90°F (32°C). Why this matters: a hot filling melts the butter in raw pastry before the oven can set it, which is how you get a greasy, soggy bottom crust. A shallow layer on a tray cools much faster than a deep bowl, and it stops the slices at the bottom from carrying on cooking in their own heat. The syrup will look loose while hot and tighten as it cools; judge the thickness cold, not hot.
- Use it, chill it or freeze it flat. You now have 4 to 4 1/2 cups (1 to 1.1 litres) of filling, roughly 2 1/4 to 2 1/2 lb (1 to 1.1 kg). That fills one standard 9-inch (23 cm) pie, or makes 8 servings of about 1/2 cup (120 to 135 ml) each. To keep it, pack it into an airtight container and refrigerate for 3 to 4 days (2 days if you follow UK guidance; see the safety notes). To freeze it, use the tapioca version, spoon it into a freezer bag, press the bag flat into your pie plate (pie dish) so it freezes in exactly the shape of the pie, then lift the frozen disc out and store it. Why this matters: a filling frozen in the shape of the dish can go straight from freezer to raw pastry shell with no thawing, and a flat pack chills and freezes quickly. The short note on baking it in a pie is in the section on how much filling a pie takes.
Safety & hygiene Important
- Do not can this recipe: canning needs its own tested formula. This stovetop filling is thickened with cornstarch or tapioca and may contain butter, and it must not be water-bath canned. The only home-canning method for apple pie filling tested by the USDA and the National Center for Home Food Preservation uses a specific modified starch, cook-type Clear Jel, fixed jar sizes and fixed processing times. University of Illinois Extension explains the reason: “Other thickeners like cornstarch clump when canning and may interfere with heat being able to reach throughout the jar.” A filling that is too thick insulates its own center, so the middle of the jar may never get hot enough. If you want shelf-stable jars, follow the tested National Center for Home Food Preservation procedure exactly, as described in the make-ahead section, or freeze this filling instead.
- Fridge: 3 to 4 days in the US guidance, 2 days in the UK. No food-safety agency publishes a figure for cooked apple filling specifically, so the general rule for cooked leftovers applies. In the US, the USDA’s guidance is to refrigerate cooked food within 2 hours, at 40°F (4°C) or below, and use it within 3 to 4 days. In the UK, the Food Standards Agency’s advice is stricter: cool leftovers within 1 to 2 hours, keep the fridge at 5°C (41°F) or below, and eat them within 2 days. The acidity and sugar of the filling make it a lower-risk food than meat leftovers, but yeasts and molds still grow in it, so the “up to a week” you will see on some recipe pages is a guess about quality, not a safety figure. If it smells fermented, fizzes or shows any mold, throw it away. Take out and warm only what you are about to serve, and do not rewarm the same portion twice.
- Freezer: months are about quality, not safety. Food held at 0°F (-18°C) stays safe indefinitely; the time limits you see are about texture and flavor. Recipe pages give anything from 2 to 12 months for apple pie filling. For best quality, plan to use it within 3 to 4 months, the figure both the USDA and the UK Food Standards Agency give for cooked and baked foods; after that it is still safe, but the slices soften and the flavor fades. Wrap it tightly with the air pressed out to prevent freezer burn. Bake it from frozen in a raw pastry shell, or thaw it overnight in the fridge, never on the counter, and use thawed filling within a day (UK guidance is 24 hours; the USDA allows 3 to 4 days for food thawed in the fridge). Label the bag with the date and the starch you used.
- Boiling sugar syrup burns worse than boiling water. During the reduction the pot holds a concentrated syrup that is hotter than boiling water and sticks to skin. Use a long-handled heatproof spatula, fold away from yourself, and keep children back from the stove. Lift the lid of the covered pot away from your face, because the steam under it scalds. When you tip the filling onto the baking sheet, set the sheet on a flat, stable surface first and pour low and slowly so the syrup does not splash.
- Allergens and substitutions. As written, the only major allergen in the filling is milk, from the optional butter; leave it out and the filling is dairy-free and vegan. If you use a plant-based block instead, check its label, because many contain soy or nut oils and some carry a “may contain milk” warning. Bottled lemon juice, if you swap it for fresh, usually contains sulphites. The serving ideas on this page add their own allergens: pastry crumbs, shortbread, puff pastry and biscuits bring wheat and usually milk, sometimes egg, and ice cream, crème fraîche, whipped cream, yogurt and cheddar bring milk. Cornstarch, tapioca starch and Clear Jel are all naturally gluten-free, but check the packet for a “may contain” warning if you cook for someone with celiac disease, and remember that all-purpose flour (plain flour), which some recipes use as a thickener, is not. Ground spices are occasionally packed alongside mustard, celery or nuts, so read those labels too if that matters at your table.
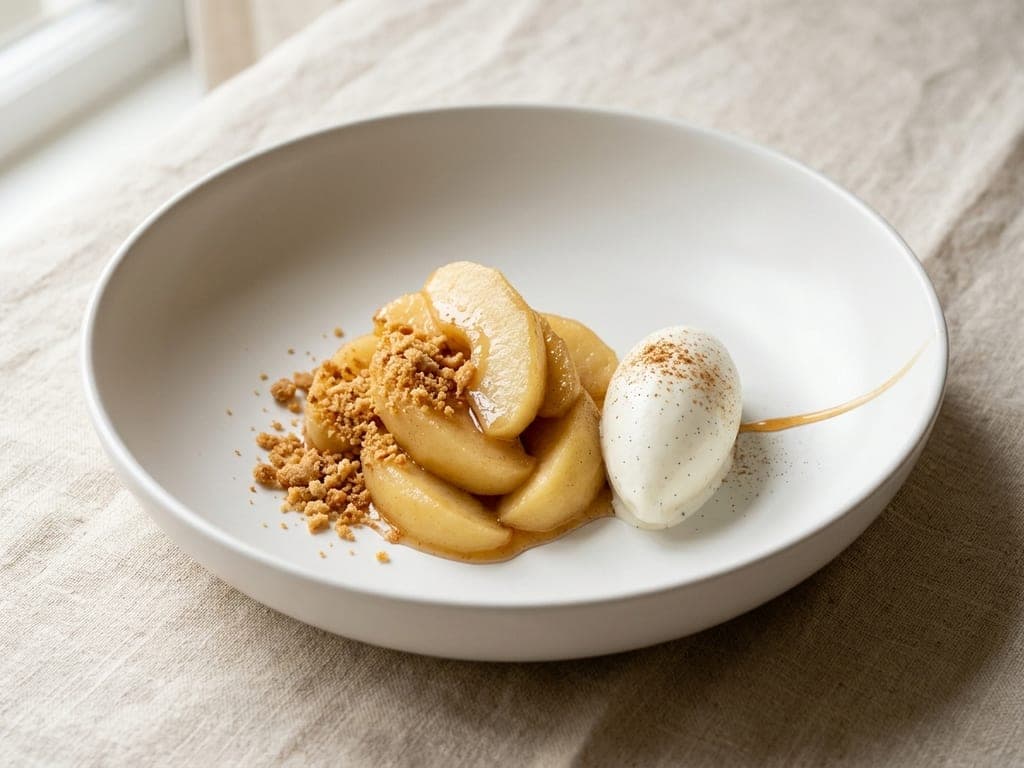
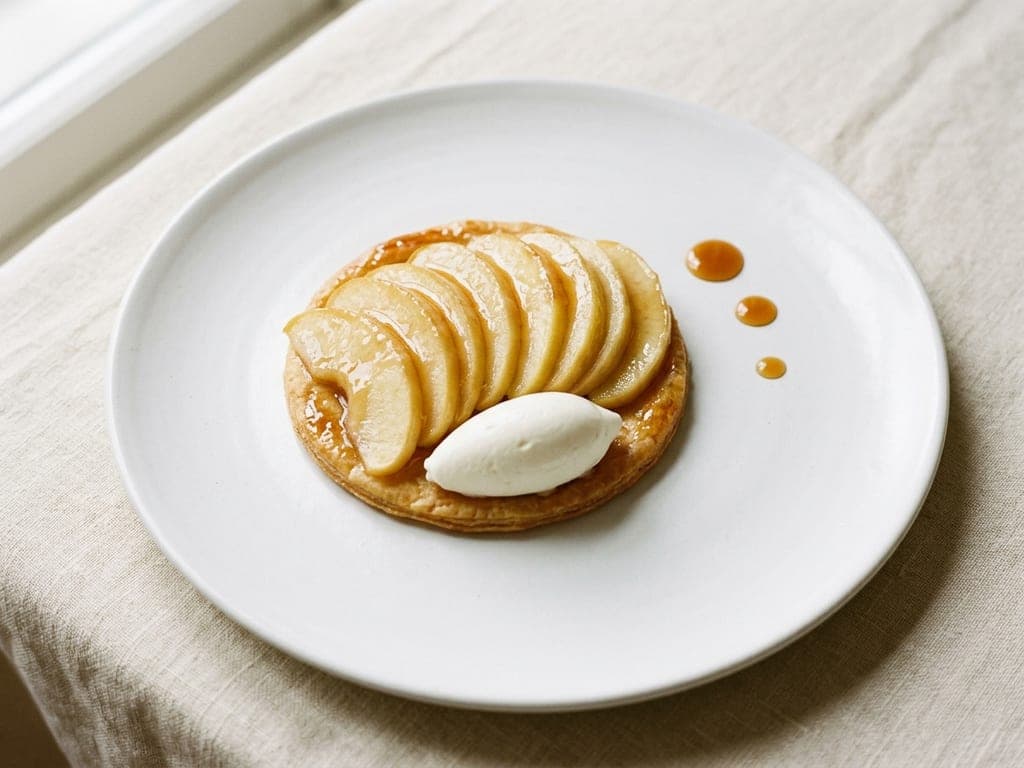
3 ways to plate it
Why a gentle hold keeps the slices firm (and who worked out the numbers)
It sounds backwards that cooking apples twice makes them firmer than cooking them once, but it is well documented. Apples contain an enzyme, pectin methylesterase, that modifies the pectin holding their cells together so that calcium already present in the fruit can cross-link it into a tougher, heat-stable network. The enzyme does almost nothing at room temperature, works hard when the fruit is warm, and is destroyed when the fruit gets hot. Give it time in its working range and the slices are armored before the real cooking starts.
The numbers most cooks use are the ones J. Kenji López-Alt printed at Serious Eats: hold the apples between 140 and 160°F (60 to 71°C) for around 10 minutes, and be aware that apples whose pectin has not been set start to fall apart at about 183 to 185°F (84 to 85°C). He baked par-cooked and raw slices side by side and reported that the par-cooked ones stayed intact while the raw ones cooked down toward applesauce. The idea is not his, and he says so. The technique of gently pre-cooking pie apples was popularized by Cook’s Illustrated and America’s Test Kitchen, whose deep-dish apple pie explains that “When the apples are gently heated, their pectin is converted to a heat-stable form that keeps them from becoming mushy when cooked further in the oven.” A 2005 Cook’s Illustrated sidebar on shrinking pie apples gave the enzyme explanation and a low-heat ceiling, telling readers to keep the apples below 140°F (60°C) while they pre-cook in a covered Dutch oven. López-Alt credits the magazine for the explanation and for the rule of staying close to, but not above, 160°F (71°C). The 140 to 160°F range, the 10 minutes and the 183 and 185°F figures are in his wording, and his range is the one this recipe follows.
The laboratory numbers agree with the kitchen ones. A 2000 study of the enzyme purified from Golden Delicious apples (Denès, Baron and Drilleau, Journal of the Science of Food and Agriculture) put its optimum temperature at 63°C (145°F), which sits squarely inside the 60 to 71°C window. That figure was measured on the purified enzyme, not inside a slice of apple, so read it as support for the window and not as a setting to aim for. Food scientists have used the same trick, a low-temperature hold before high-heat processing, to keep canned and frozen vegetables firm for decades.
There is an honest caveat that recipe pages leave out: the hold does not help every apple equally. A 2016 study of apples cooked sous vide found the enzyme up to twice as active in Mondial Gala as in Granny Smith between 48 and 65°C (118 and 149°F), which overlaps the lower half of the window. In practice, the hold pays off most on sweeter dessert apples such as Gala, Golden Delicious and Braeburn. Granny Smith holds its shape mainly through its acidity and gains the least, though the hold does it no harm.
If you do not own a thermometer, López-Alt’s other method needs none, because a measured amount of boiling water sets the temperature for you. His ratio is 3 quarts (2.8 litres) of boiling water for 4 to 4 1/2 lb (1.8 to 2 kg) of whole apples, which scales to 2 1/2 quarts (2.4 litres) for this batch. Put the room-temperature slices in a large heatproof bowl or pot, pour the measured boiling water over them, cover and leave for 10 minutes, then drain in a colander for about 10 minutes, tossing now and then, until the slices are dry. The amount matters: measured this way, he reports, the apples sit at around 160°F (71°C), while more water would run hotter and less would run cooler. He tested it on slices 1/4 inch (6 mm) thick; thicker wedges warm through more slowly, so the thermometer method is the surer one for this recipe. Use a bowl that is stable and made to take boiling water, and drain it away from you. Then toss the drained slices with the sugar and spices and carry on from the reduction step; there will be less juice to cook off, so it will take less time.
The best apples for pie filling, in the US and in Europe
The rule is short: tart and dense holds its shape. Acid strengthens pectin, and a dense apple with little air between its cells has less room to collapse. In the best-known American side-by-side test, López-Alt baked ten supermarket varieties in pies and scored Golden Delicious 8 out of 10, Braeburn 7, Gala 6 and Granny Smith 5 (it held its shape almost indefinitely but tasted less of apple), with McIntosh at 3, Fuji at 2 and Red Delicious at 1. The home-canning guidance from the National Center for Home Food Preservation asks for “firm, crisp apples” and names Stayman, Golden Delicious and Rome.
That test covered American supermarket apples only, and readers elsewhere are left to guess. Measured data helps. In one Austrian laboratory comparison of European cultivars, Roter Boskoop (Belle de Boskoop) was the most acidic by a wide margin, at about 13 g of malic acid per litre with a firmness of about 7.2 kg on a penetrometer, while Braeburn was the firmest, at about 8.9 kg, with moderate acidity of about 7.6 g per litre. Cox’s Orange Pippin was tart, at about 9.9 g per litre, but soft, at about 5.4 kg, and Elstar was softer still, at about 5.2 kg, with acidity of about 7.8 g per litre, no higher than Braeburn’s. Read together: Boskoop holds through acid, Braeburn holds through density, Cox is a flavor apple that cooks down, and Elstar, the softest of the four, belongs with Cox and not with the firm bakers.
Storage matters as much as variety. In a South Tyrol trial of commercial cultivars, Granny Smith measured 7.7 kg at harvest and still 7.4 kg after two months of cold storage, a loss of about 4%, while Jonagold fell from 6.5 kg to 4.7 kg, a loss of more than a quarter. Granny Smith was also the most acidic commercial apple in that trial at about 10.3 g per litre. That is why Granny Smith is the safe year-round supermarket choice and why Jonagold and Golden Delicious are at their best for baking in autumn, soon after harvest. These figures come from different orchards, years and laboratories, so compare apples within one study, not across them.
What to buy. In the US: Granny Smith with Golden Delicious or Braeburn, or Pink Lady on its own. In Europe: Boskoop with Braeburn or, in autumn, Jonagold, or Granny Smith with Braeburn the rest of the year. Opinions on mixing differ: López-Alt and Stella Parks both argue for a single variety so every slice cooks at the same rate, while other bakers like one tart apple and one aromatic one. The position that satisfies both is to blend only apples that are all firm bakers and never to pad the pot with a soft variety such as McIntosh.
A word on Bramley, the classic British cooking apple. It is very acidic, yet it famously “falls” to a fluffy purée when cooked, so it is the exception to the acid rule. Use it if you want a traditional soft British filling, or blend it half and half with a firm apple, but do not expect distinct slices from Bramley alone.
How much filling a 9-inch (23 cm) pie takes, and how to bake it
Recipes that call for “5 apples” are not much help, because apples vary a great deal in size. Work by weight. One pound (454 g) of whole apples loses about a third to peel and core and gives roughly 10 oz (285 g) of prepared fruit, about 3 cups (700 ml) of thin slices. King Arthur Baking’s standard for a raw-filled 9-inch (23 cm) pie is 8 cups (1.9 litres) of slices, from about 2 2/3 lb (1.2 kg) of whole apples.
A pre-cooked filling changes the sums, because the shrinking happens in the pot instead of in the oven. Pastry chef Stella Parks measured sliced apples losing about a third of their volume as they give up their juice to sugar alone. Cooked and reduced on the stove they lose more, closer to half. In a raw pie the pastry lid sets early in the bake while the fruit underneath is still tall, then the fruit sinks and leaves the familiar hollow under the crust. Cooked filling has already shrunk, so it packs in level, the lid sits on the fruit, and you can fit more apple into the same dish. This recipe starts with 3 1/2 lb (1.6 kg) of whole apples for that reason, and ends as 4 to 4 1/2 cups (1 to 1.1 litres) of dense filling, roughly 2 1/4 to 2 1/2 lb (1 to 1.1 kg), which fills one standard 9-inch (23 cm) pie plate level with the rim. For comparison, the usual advice for canned filling is two 21 oz (595 g) cans for a 9-inch (23 cm) double-crust pie, which is a similar amount.
Scaling: for a deep-dish 9-inch (23 cm) pie, make one and a half batches, from about 5 1/4 lb (2.4 kg) of whole apples, which gives roughly 6 to 7 cups (1.4 to 1.7 litres). For an 8-inch (20 cm) pie, three quarters of a batch is enough. When you scale up, use a wider pot rather than a deeper pile, so the hold stays even and the juices can still reduce in about 10 minutes.
To bake it in a pie: line the plate with cold pastry, spread the completely cooled filling in level, top with a pastry lid, lattice or crumble, and cut vents in a solid lid. A workable schedule for a pre-cooked filling, a little longer than the one López-Alt gives for his own pie, is 425°F (220°C) on a lower-middle rack for about 25 minutes to set the bottom crust, then 375°F (190°C) for 25 to 30 minutes more, until the pastry is deep golden and you can see the filling bubbling at the vents. Cover the rim with foil if it colors too fast. Because the apples are already cooked, you are baking the pastry and reheating the filling, not cooking the fruit. Let the pie cool for several hours before you cut it, because the filling sets as it cools. Pastry, assembly and the full bake will get their own pages.
Make-ahead: fridge, freezer and the one tested way to can it
Popular recipes give 2, 3, 4 and 5 days for the fridge and 2, 3 and 6 months for the freezer, with no reasons. Here is one position with its sources. In the fridge, treat the filling as a cooked leftover: 3 to 4 days at 40°F (4°C) or below under the USDA’s general rule, or 2 days if you follow the UK Food Standards Agency’s stricter advice. The syrup stiffens when cold; fold it gently before using and it loosens again.
In the freezer, make the tapioca version, cool it, and freeze one pie’s worth in a bag pressed into the pie plate, as Penn State Extension recommends. To bake, set the frozen disc straight into a raw pastry shell, add the lid and bake as usual; Penn State Extension says to allow an extra 20 to 25 minutes. No thawing is needed for pie. For anything else, thaw it overnight in the fridge and use it within a day. For best quality, use frozen filling within 3 to 4 months. If you already froze a cornstarch filling and it has wept, it is safe; warm it gently in a pan to tighten the syrup again.
Canning is a different recipe, not a different storage option, so follow the tested National Center for Home Food Preservation (NCHFP) procedure and nothing else. What follows is a summary so you can see how different it is, not a set of instructions to can from. Work from the NCHFP’s own apple pie filling page and its guide to using a boiling-water canner, which cover jar preparation, lids, water depth, timing and seal checks that are not repeated here. The tested formula, adapted from the USDA Complete Guide to Home Canning, makes one quart (0.95 litre) jar from 3 1/2 cups (830 ml) of blanched apple slices, 3/4 cup plus 2 tbsp (about 175 g) of granulated sugar, 1/4 cup (60 ml) of cook-type Clear Jel, 1/2 tsp cinnamon, 1/2 cup (120 ml) of cold water, 3/4 cup (180 ml) of apple juice and 2 tbsp of bottled lemon juice. The slices are blanched in batches of 6 cups (1.4 litres) in 1 gallon (3.8 litres) of boiling water, for 1 minute counted from when the water returns to a boil, then drained and kept hot in a covered pot. The sugar, Clear Jel, cinnamon, water and juice are cooked until thick and bubbling, the lemon juice is added and boiled for 1 minute with constant stirring, and the hot apples are folded in. The jars are filled without delay, leaving 1 inch (2.5 cm) of headspace, then the lids are adjusted and the jars are processed immediately.
Processing times in a boiling-water canner, for pints or quarts: 25 minutes up to 1,000 ft (305 m) above sea level, 30 minutes from 1,001 to 3,000 ft (306 to 914 m), 35 minutes from 3,001 to 6,000 ft (915 to 1,829 m), and 40 minutes above 6,000 ft (1,829 m). Follow the full procedure on the NCHFP website, not this summary, and do not change the jar size, the starch or the quantities, apart from the extra lemon juice the NCHFP page itself allows for apples that are not tart: the times were validated for that exact density. Bottled lemon juice is specified because its acidity is standardized. Butter and other fats are not part of the tested recipe.
Why Clear Jel and only Clear Jel? Elizabeth Andress of the University of Georgia, who directed the National Center for Home Food Preservation, wrote that it “does not break down in the acid food mixtures and does not thicken enough during heat processing to interfere with the intended effect of the heat on killing bacteria during canning.” The sauce stays thin while the jar heats and thickens as it cools. The canned version trades some texture for shelf life: its apples are blanched at a full boil, the opposite of the gentle hold, and it carries much more starch and sugar. If firm slices are the goal and you have freezer space, freeze.
Pre-cooked filling is older than the can, and older than America
Cooking the apples before they meet the pastry feels like a modern test-kitchen trick. It is one of the oldest ways of making the dish. The recipe usually cited as the first English apple pie, “For to make Tartys in Applis”, reads in full: “Tak gode Applys and gode Spycis and Figys and reysons and Perys and wan they are wel ybrayed colourd wyth Safroun wel and do yt in a cofyn and do yt forth to bake wel.” The fruit is “ybrayed”, pounded in a mortar, so this was a spiced paste of apples, figs, raisins and pears, colored with saffron, in a pastry case. No sugar is named. Most pages that quote it say it comes from the Forme of Cury. It does not. It is recipe XXIII in a separate manuscript that Samuel Pegge printed as an appendix to his 1780 edition of the Forme of Cury, under the heading “Ancient Cookery. A.D. 1381”, a date taken from a neighboring text in the same manuscript.
A Dutch cookbook printed in Brussels around 1514, Een notabel boecxken van cokeryen, has an “Appeltaerten” that works the other way round: the apples are peeled, cut small and baked raw under a pastry lid, then the lid is cut open, the fruit is stirred to a mash with a wooden spoon and mixed with grains of paradise, ginger, cinnamon, nutmeg, cloves, mace and sugar. For a richer tart the cook adds crumbled sugar cakes and cream and returns it to the oven to dry. The English cookery writer Hannah Glasse, in the first edition of The Art of Cookery in 1747, layered raw quartered apples with sugar and lemon, then boiled the peels and cores with a blade of mace, strained the liquid and boiled it down with a little sugar “till there is but very little and good” before pouring it into the pie. She does not say why, but peels and cores are where much of an apple’s pectin sits, so her syrup did some of the job that starch does now.
The first cookbook written by an American, Amelia Simmons’s American Cookery of 1796, prints both methods side by side. Her “Apple Pie” begins “Stew and strain the apples”, a pre-cooked purée flavored with lemon peel, cinnamon, mace and rose-water. Her “buttered apple Pie” bakes raw quartered apples and seasons them afterwards by lifting the lid. Fannie Farmer’s Boston Cooking-School Cook Book of 1896 already has a filling any modern make-ahead cook would recognize: apples baked covered “three hours in very slow oven, when apples will be a dark red color”, then, in her words, “Cool, and bake between two crusts.” Neither Simmons nor Farmer thickens apple pie with anything at all.
The can came much later, and nobody can honestly name its inventor. The Comstock brand claimed first use of its name in 1931 in a later trademark filing, and the earliest dated advertisement found for its canned “Pie-Sliced Apples” ran in Woman’s Day in September 1944, but neither fact shows a ready-to-use filling. The best dated statement is from a 1960 Canadian government bulletin on the subject, which opens: “Canned ready-to-use fruit pie fillings are not new products having been on the market since about 1946.” The Wilderness brand’s trademark record gives a first use of May 1950. Clear Jel reached the home canner later still. The USDA’s Complete Guide to Home Canning, developed at Penn State, was first published in 1988, and it is reported secondhand that a canned apple pie filling was the first approved home-canning recipe to use the starch; that could not be checked against the 1988 guide itself.
As for the saying, “as American as apple pie” has been found as early as October 1910, in a Metropolitan Magazine review that called a new play “as American as apple pie”, a citation reported by the word historian Barry Popik and, independently, by the researcher Peter Jensen Brown. It appears again on 4 April 1920, when Edwin C. Hill, writing about the circus in The Sun and the New York Herald, referred to “ideas as American as apple pie.” The 1924 suit advertisement often given as the origin is simply the earliest example in the Oxford English Dictionary, as Popik has documented. The apples, the pastry and the recipe all crossed the Atlantic first.
Beyond pie: what to make with apple pie filling
A filling with firm slices and a glossy syrup is a finished dessert component, which is why it is worth making even when no pie is planned. Warm it gently in a small pan and it is ready to plate.
Baked: hand pies and turnovers (chop the slices smaller first so they fit), a crumble or crisp (the filling is already sweetened, so cut the sugar in the topping), a cobbler, filled puff pastry squares, or a layer in an apple strudel or a bread-and-apple pudding. Unbaked: spooned warm over vanilla ice cream, pancakes, waffles, French toast, porridge or thick yogurt; layered into a trifle or a parfait with crushed biscuits; or served cold beside a wedge of sharp cheddar.
It also belongs on the savory side of a holiday table. A spoonful of warm filling, made with the smaller amount of cinnamon, sits well next to roast pork or a pork chop, and on a Thanksgiving table it can stand in for apple sauce. One batch equals roughly two 21 oz (595 g) cans in any recipe that calls for canned apple pie filling.
Questions, answered
Should you cook apple pie filling before baking?
You do not have to, but it fixes the three classic apple pie problems. Pre-cooked apples have already shrunk, so there is no hollow gap under the crust. Slices held at 140 to 160°F (60 to 71°C) for 10 to 20 minutes firm up their own pectin and stay intact in the oven instead of turning to mush. And the juices are reduced in the pot, not in the pastry, so the pie is not watery. The common advice to cook the apples for “just 5 minutes or they turn to mush” has it wrong: temperature is what matters, not minutes. Unprotected apples start to collapse at about 183 to 185°F (84 to 85°C).
What is the best thickener for apple pie filling?
It depends on what you will do with the filling. To bake or eat within a few days, cornstarch (cornflour in the UK): 1 tbsp plus 1 tsp, about 10 g, for one 9-inch (23 cm) pie. To freeze, tapioca starch (2 1/2 tbsp, about 16 g) or Instant ClearJel, because cornstarch and flour separate and weep after freezing. To can, cook-type Clear Jel only, in the tested USDA recipe. Whichever you use, cook the juices down first, so the starch is setting a syrup and not a flood.
What apples are best for apple pie filling?
Firm apples that are tart, dense or both. In the US: Granny Smith, Golden Delicious, Braeburn and Pink Lady. In Europe: Boskoop, Braeburn and, in autumn, Jonagold, with Granny Smith all year. A good pairing is one tart apple and one aromatic one, as long as both are firm bakers. Avoid soft varieties such as McIntosh and Red Delicious, which cook down to sauce. Bramley is delicious but collapses to a purée, so blend it with a firm apple if you want slices.
How do you keep apple pie filling from being watery?
Deal with the juice before the starch. Apples release most of their water when they are heated, so a filling that is merely warmed and thickened will thin out again in the oven. Hold the slices at 140 to 160°F (60 to 71°C) first so they stay firm, then boil the juices in an open pot for 8 to 10 minutes until a spatula leaves a slow-closing trail, and only then add the starch and keep it at a visible bubble for 1 minute. Finally, judge the thickness when the filling is cold: it always looks runny hot and sets as it cools.
Can you freeze apple pie filling?
Yes, and it freezes very well if you choose the right starch. Use tapioca starch or Instant ClearJel; Penn State Extension notes that fillings thickened with flour or cornstarch separate in the freezer. Cool the filling, seal it in a freezer bag and press the bag into your pie plate so it freezes in the shape of the pie. For best quality use it within 3 to 4 months; at 0°F (-18°C) it stays safe for longer than that. For pie, do not thaw it: put the frozen disc into a raw pastry shell and add 20 to 25 minutes to the baking time.
How long does homemade apple pie filling last in the fridge?
Plan on 3 to 4 days in an airtight container at 40°F (4°C) or below, which is the USDA’s general rule for cooked leftovers; UK guidance from the Food Standards Agency is 2 days. No agency publishes a figure for apple filling specifically, and the “up to a week” on some recipe pages is a guess. Cool it on a tray and refrigerate it within 2 hours of cooking. If you need longer than a few days, freeze it.
Can you can apple pie filling with cornstarch?
No. Cornstarch, flour and tapioca thicken in the jar while it is being heated, which can stop the heat reaching the center, and they also break down into a runny, clumped filling on the shelf. The tested USDA and National Center for Home Food Preservation recipe uses cook-type Clear Jel, which stays thin during processing and thickens as the jar cools. If you cannot find Clear Jel, the simple way out is to freeze the filling instead, or to can plain apple slices by a tested method and thicken them on the day you bake. Factory-canned fillings do list corn starch, but they are processed with industrial equipment under validated conditions, which a home kitchen cannot copy.
How much apple pie filling do you need for a 9-inch pie?
A standard 9-inch (23 cm) pie takes 4 to 4 1/2 cups (1 to 1.1 litres) of cooked filling, roughly 2 1/4 to 2 1/2 lb (1 to 1.1 kg). That is one batch of this recipe, made from 3 1/2 lb (1.6 kg) of whole apples, or two 21 oz (595 g) cans of bought filling. A deep-dish 9-inch (23 cm) pie takes one and a half batches, from about 5 1/4 lb (2.4 kg) of whole apples. If you are filling a pie with raw slices instead, the usual figure is 8 cups (1.9 litres), from about 2 2/3 lb (1.2 kg) of whole apples.
How do you thicken apple pie filling that turned out runny?
Return it to a wide pan and bring it to a steady bubble. Often that is all it needs, because starch that never boiled never thickened. If it is still loose after 2 minutes, stir 1 tsp of cornstarch into 1 tbsp of cold water, fold it in and boil for 1 minute more. Do not sprinkle dry starch onto hot filling, because it clumps. Then cool a spoonful on a cold plate before deciding whether to add more: filling that looks thin when hot is usually right when cold.
What can you make with apple pie filling besides pie?
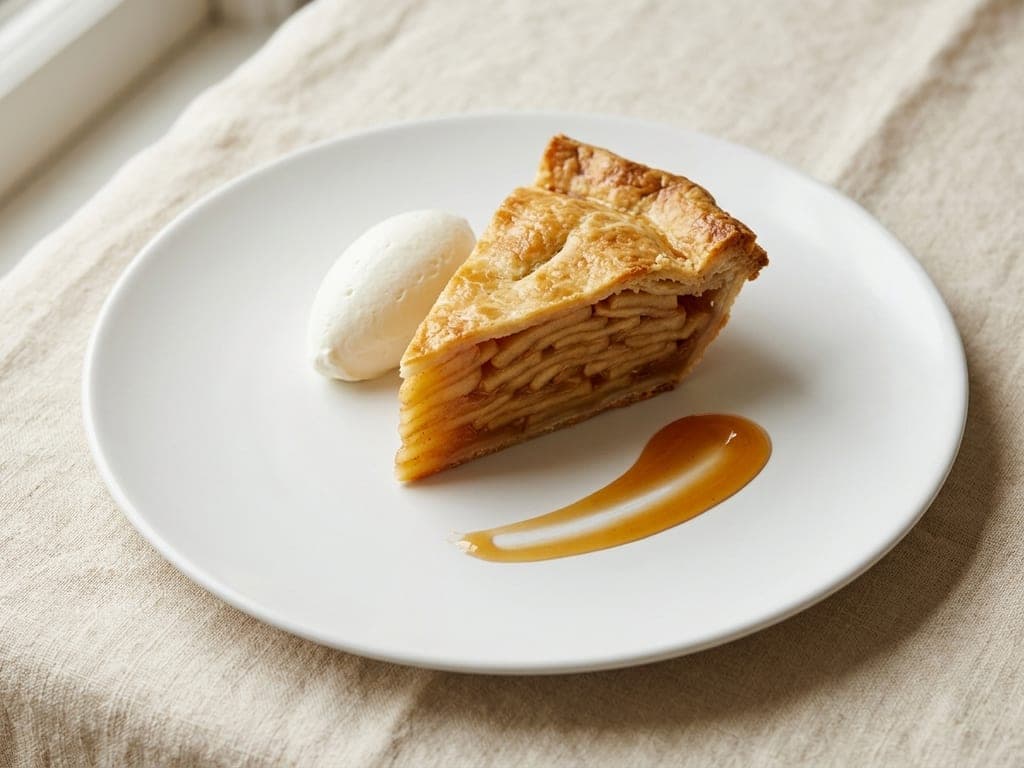
Hand pies and turnovers, a crumble or crisp, a cobbler, puff pastry tarts, trifle and parfaits, or a warm topping for ice cream, pancakes, waffles, French toast, porridge and yogurt. It also works as a side for roast pork. On this page the filling is plated three ways: as a deconstructed apple pie in a shallow bowl, as a glazed apple fan on a pastry disc, and beside the classic slice.
How many calories are in homemade apple pie filling?
About 142 kcal per serving, an eighth of the batch, with the butter, or about 117 kcal without it. The arithmetic, using USDA FoodData Central values: 1,030 g of peeled apple slices (65% of 3 1/2 lb, the 1 kg of slices to the nearest 10 g) at 48 kcal per 100 g is 494 kcal; 50 g of granulated sugar is 194; 55 g of light brown sugar is 209; 10 g of cornstarch is 38; 28 g of butter is 201; 1 tbsp of lemon juice is 3. That totals 1,139 kcal, and 1,139 divided by 8 is 142. Added sugar is 105 g for the batch, about 13 g per serving. Measured by the 89 g (about 3 oz) serving that canned fillings use, which their labels call 1/3 cup (80 ml), that works out to roughly 92 kcal and 8.5 g of added sugar, assuming the batch cooks down to about 1.1 kg (2 1/2 lb).
Snap your finished plate and let the AI plate it again — more beautifully.