How to photograph food: light, angles, phone settings and editing
Where to put the light, what to do after dark, which angle suits which dish, what to set on an iPhone, a Pixel or a Galaxy, and how far to edit, with a named source beside each instruction and our own suggestions marked as ours.
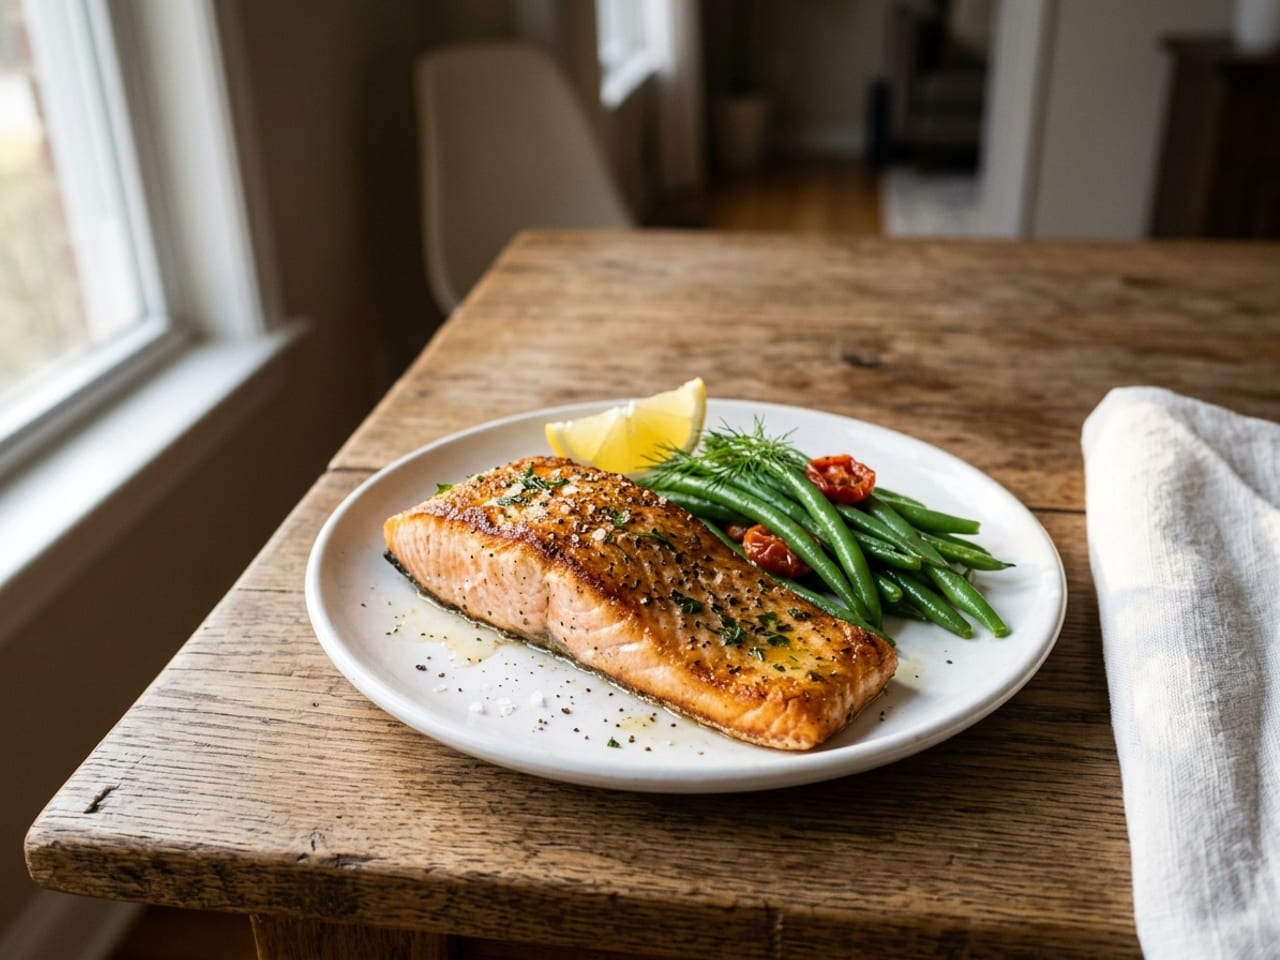
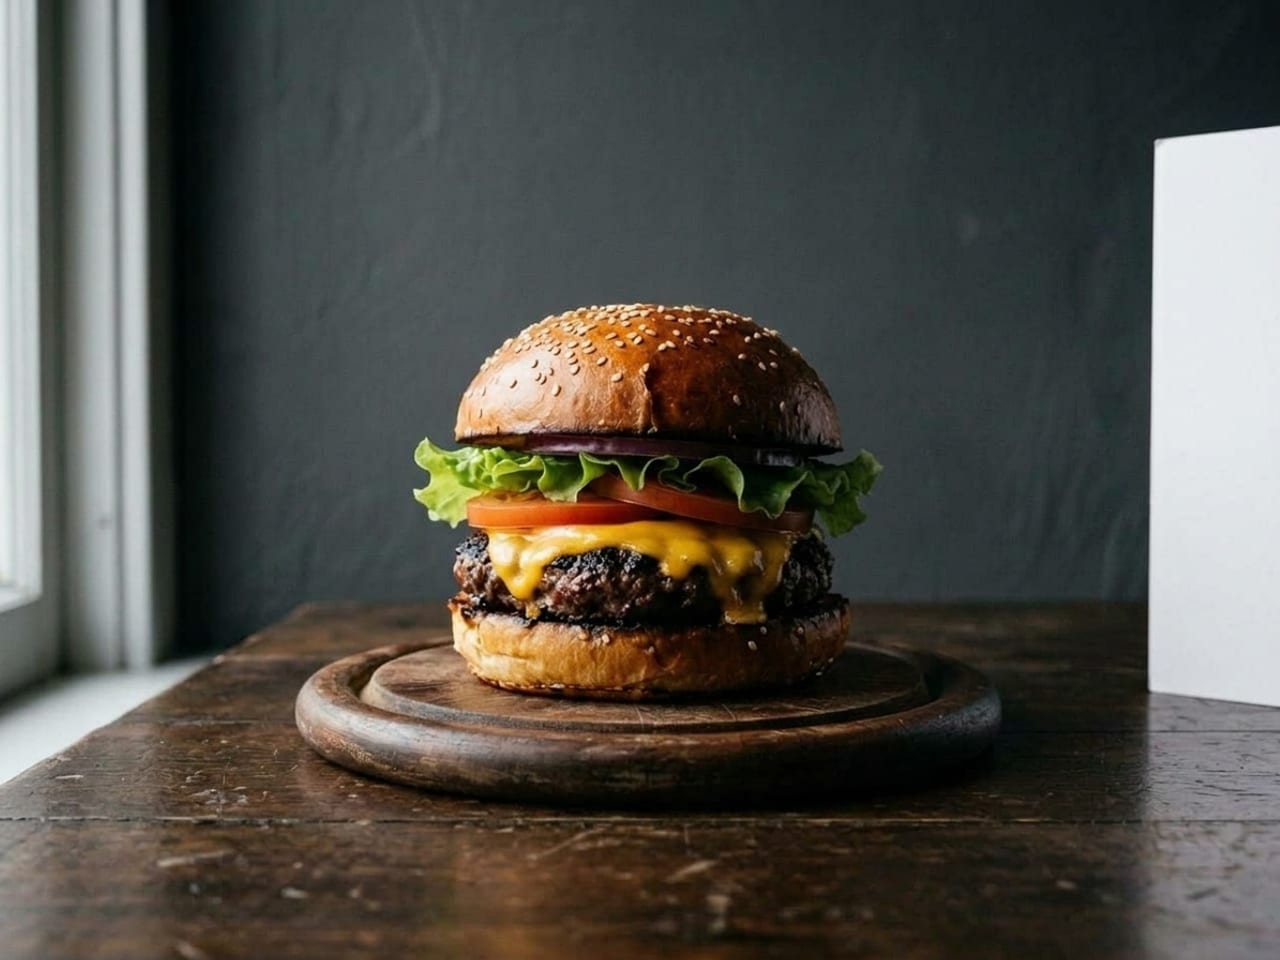
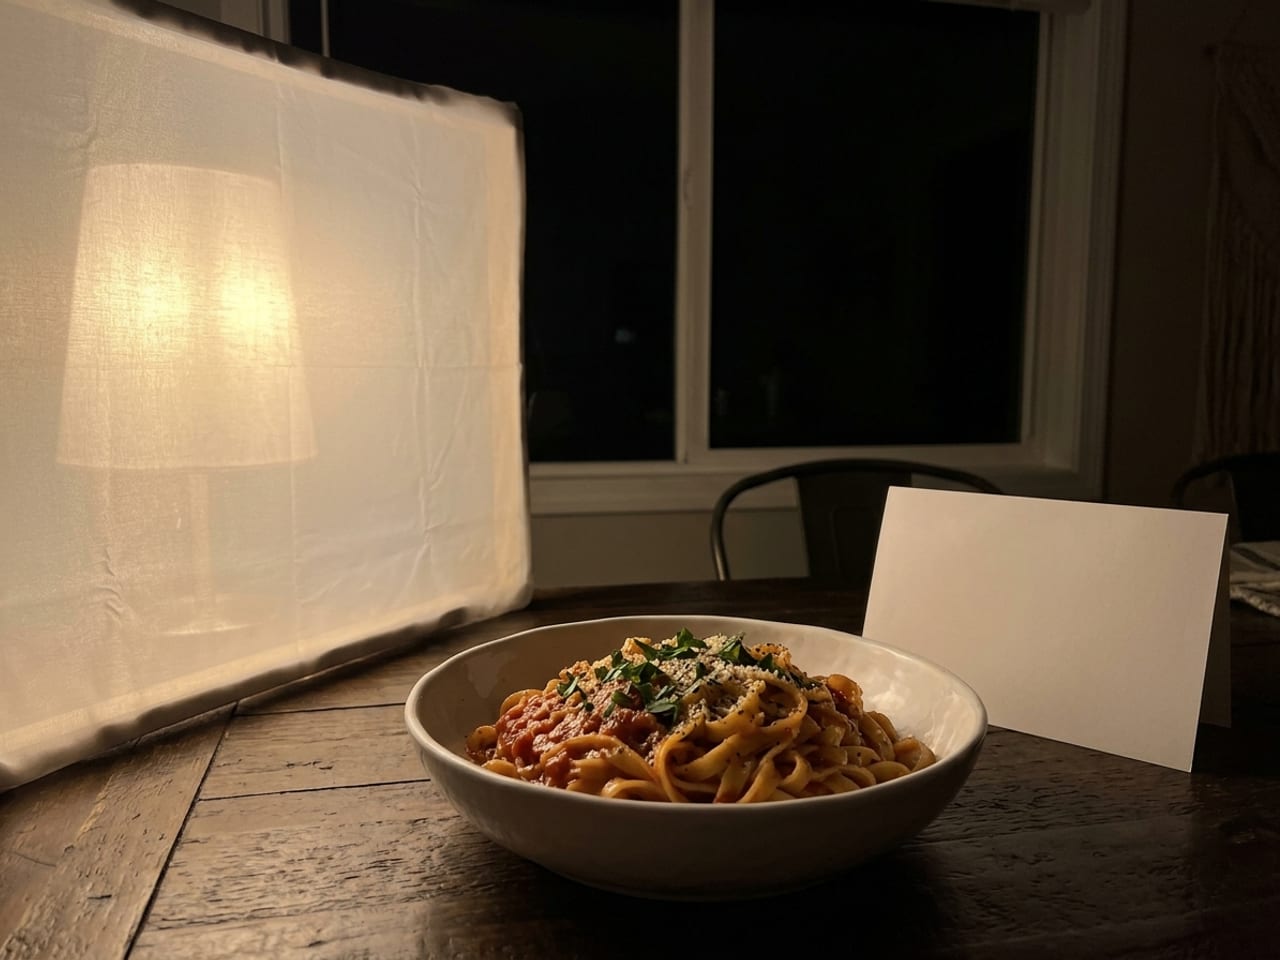
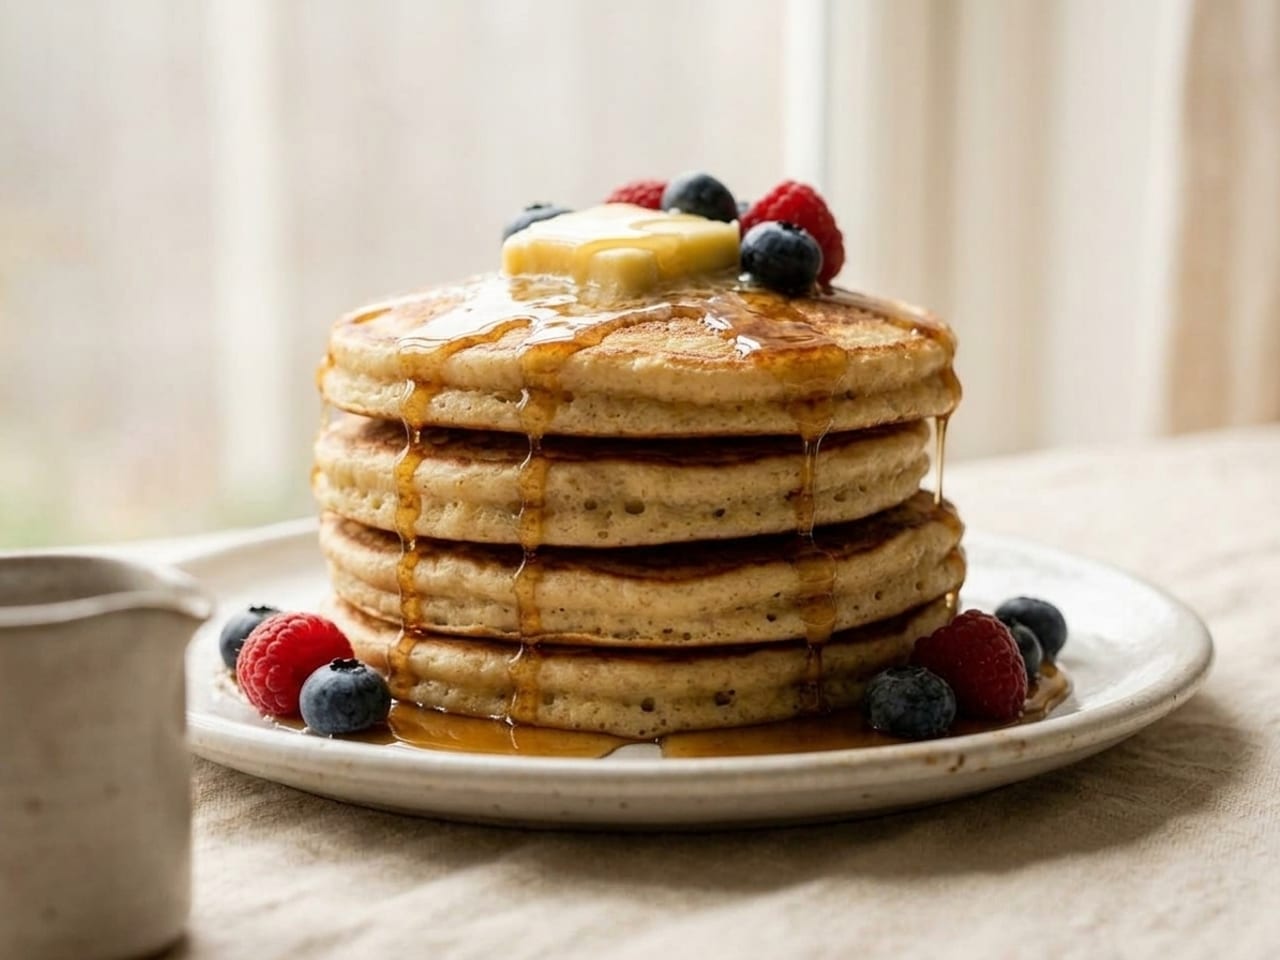
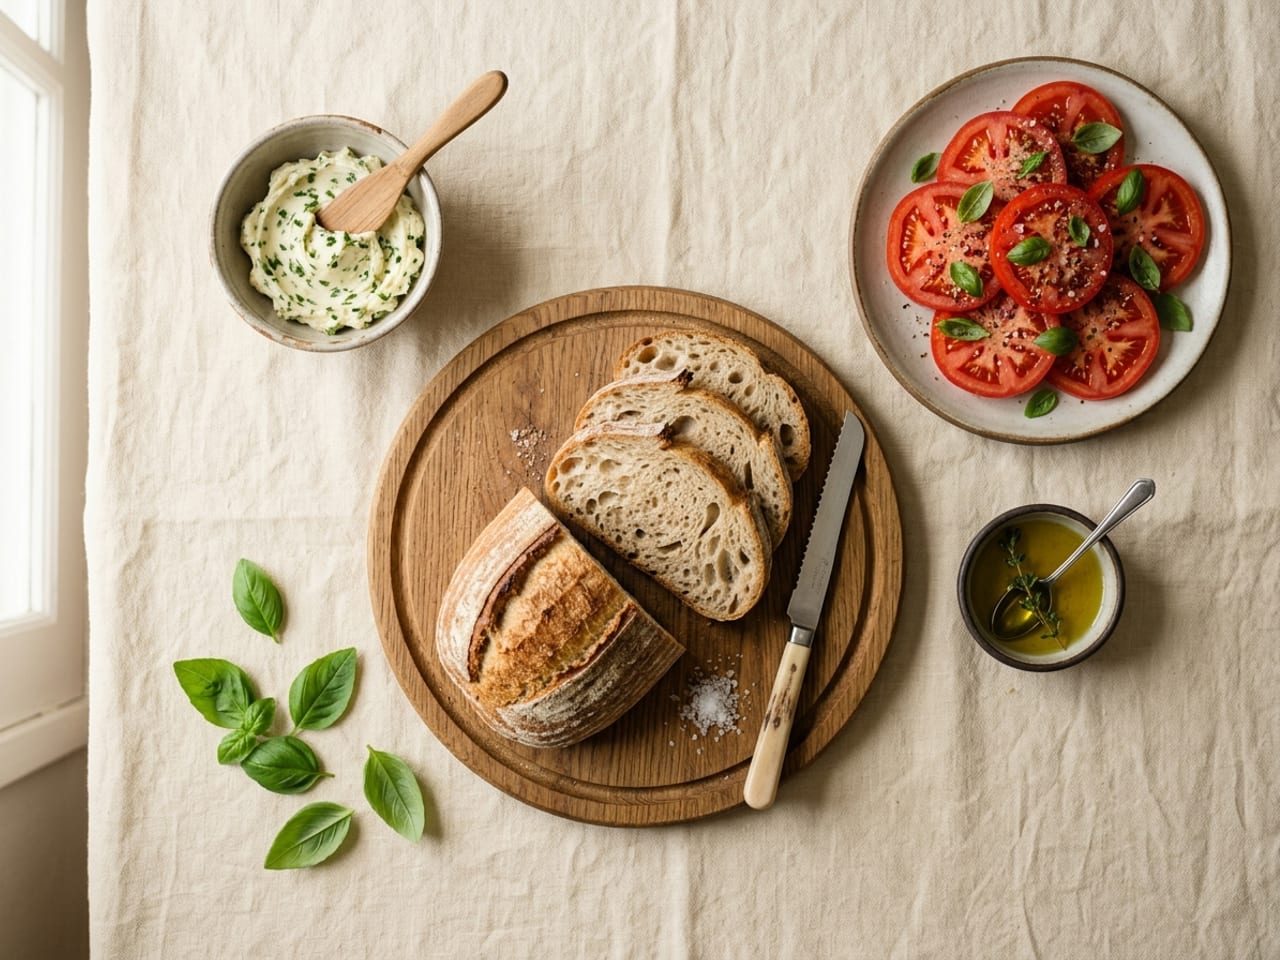
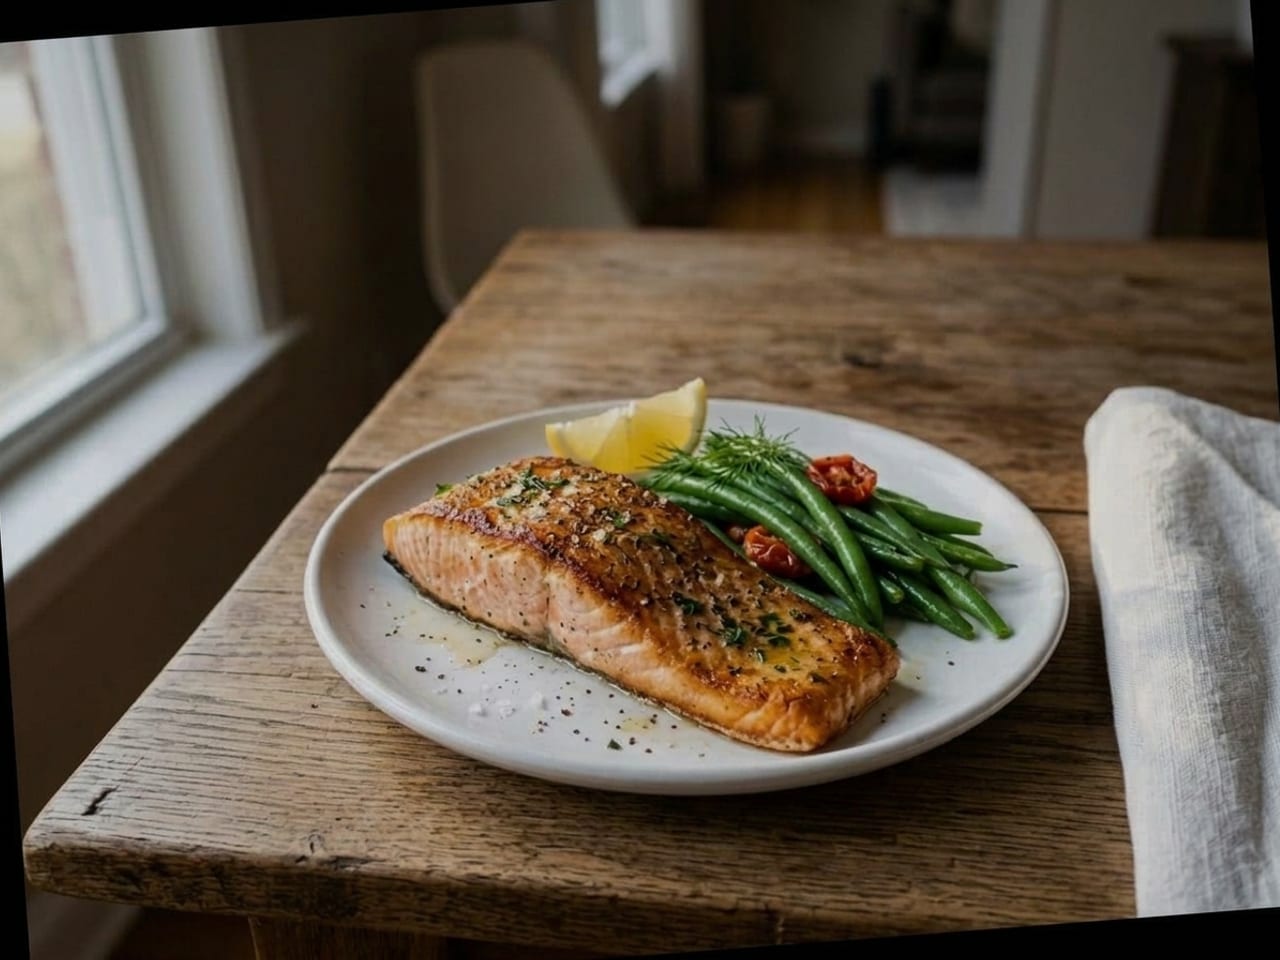
The photos on this page are AI-generated illustrations.
How to photograph food, in 7 steps
Put the plate in soft light, near a window out of direct sun, and switch the other lights off. Light it from the side or from behind, not from the front. Soften direct sun with a white sheet and bounce some light into the shadow with a white card. Keep the phone's flash off. Shoot flat food from above and tall food from the side. Wipe the lens, tap to focus, set the brightness and hold still. Then straighten, correct the white balance and edit lightly.
Jump to: Light direction · Hard and soft light · Fill · Window setup · White balance · At night · Restaurants · Flash · Angles · Dish by dish · Phone settings · Composition · Glare · Steam · Editing · Research · Mistakes · Myths · Glossary · FAQ
- Find soft light and switch the other lights off. Serious Eats calls good lighting "the single most important criteria for good photography" and says "the very best light is indirect daylight": by day, near a window, out of direct sun.1 Then turn off the lamps and the ceiling light. Rebecca Hale of National Geographic: "Competing light sources will cast cross shadows, and the color temperature of the light in your house is different from daylight."13 No window, or already dark? See food photography at night.
- Put the light to the side of the plate or behind it, not in front. The sources split on which. Rupa Nagamootoo teaches side light first;4 B&H's beginner article starts with back light.7 The sources that take a view on front light avoid it: with front light, says Nicole S. Young, the light "falls off into darkness in the back, leaving the image flat."2 Serious Eats adds that light from directly behind you "ends up casting an unwelcome shadow on your dish."1 Light direction, source by source.
- Soften hard light and bounce some into the shadow. If sun falls on the table, Serious Eats hangs "a white sheet over the window";1 Adam Waring of Digital Camera World tapes "baking parchment or greaseproof paper" over it.21 Then stand something white opposite the light: "any large white piece of posterboard will do".1 Rupa Nagamootoo: a reflector "doesn't remove all shadows and that's the key! It simply softens them."4 Hard and soft light, fill.
- Keep the phone's own flash off. Serious Eats on the built-in flash: "Don't use it." It gives "harsh reflections and glare". 1 Check the setting: Apple's guide says the iPhone camera "is set to automatically use the flash when needed", with a Flash control "to switch between Auto, On, or Off."35 Serious Eats itself says a hotshoe flash bounced off something big and white "can work",1 and other sources diffuse theirs: ceiling light and flash.
- Choose the camera angle for the dish. Serious Eats: a "flat, round pizza will usually look best shot from directly above", while a tall burger "will look great directly at eye level".1 The Institute of Culinary Education: "Most dishes look best from one of three angles: overhead, side view or 45-degree."64 On a phone the in-between view is disputed, so read the angles section before you default to it.
- Wipe the lens, tap to focus, set the brightness, hold still. Rupa Nagamootoo: "give your phone lens a quick clean" with a soft or microfibre cloth.67 Apple's steps: "Tap the screen where you want to move the focus area", then drag the control that appears next to the focus area up or down to change the exposure (second step paraphrased; Apple prints an icon in it).35 Shawn Chippendale sets it "so that the highlights aren't overexposed."66 Serious Eats: "rest your elbows or arms on something sturdy like the edge of the table."1 Phone settings, maker by maker.
- Edit lightly: straighten, white balance, brightness, a little contrast. Darina Kopcok, writing for desktop Lightroom, crops and straightens before anything else.68 Shawn Chippendale's phone order is brightness, then colour temperature ("look at what should be white"), then "a little contrast, maybe some vibrance or saturation, but be careful not to overdo anything".66 Serious Eats sets the limit: images should "pop, but not look like they've been exposed to radioactive waste." 1 Editing, app by app.
How this page was made. Every instruction is quoted or paraphrased from the published source named beside it, and anything without one is marked "ours". Plate Artists has not shot, measured or tried any of it for this guide, and the pictures are AI illustrations of each lighting situation, not photographs taken under it. Five books (by Helene Dujardin, Joanie Simon, Nicole S. Young, Andrew Scrivani and Corinna Gissemann) were read only as Google Books snippets without page numbers, some web pages only in Internet Archive captures, and most of the papers only as abstracts; each reference says which. Some of Joanie Simon's teaching is credited to the writers who summarised her videos. Phone menu names are from the makers' help pages as read on 6 October 2026 (Apple's iPhone User Guide at iOS 27, Google's Pixel Camera Help, one page of which names Pixel 11 models, and Samsung's support pages, which name no version), and menus move between versions and models. Where sources disagree they are set side by side. Brand names are descriptive only: no affiliate links, no product recommended. Sources are at the bottom.
Lighting for food photography: direction, softness, fill
Three choices make the light: where it comes from, how large it is, and how much of it you bounce back into the shadow. Each has a table or a picture below. Our research found no peer-reviewed study that compares them, so this section is photographers' practice, in their words.
Light direction: side, back, side-back, front or top
The sources do not agree on a default. Some start beginners on side light, some on back light, and one article, from a culinary school, advises against back light. The sources that take a view on front light for food (Nicole S. Young, Donna Crous, Joanie Simon and Serious Eats) advise against it;1, 2, 6, 10 Sony describes it without judging it for food.8 If you want one place to start, ours is side light with a white card opposite: that is our suggestion, not a finding.
| Light from | What it does | Foods the sources name | Who says so |
|---|---|---|---|
| Side light beside the plate, left or right | "Side lighting creates gentle shadows that define texture".3 Sony calls it "the most suitable for creating depth by adding shadows to the subject."8 The shadow side "can either be tamed with reflectors or left as-is for a more dramatic shot."2 | Crispy edges, flaky pastry and glossy sauces;3 food "with clear or flat liquid surfaces, as it tends to prevent distracting reflections on the liquid itself."2 Rupa Nagamootoo: "it works on almost every type of food."4 | Rupa Nagamootoo ("my go-to", and the one she teaches first);4 Donna Crous for Nikon ("The general rule of thumb is one-directional sidelight");6 Nikon UK's cheat sheet;5 Helene Dujardin's book (snippet: "probably the most dependable orientation").72 |
| Back light behind the plate, opposite the camera | "It is good to highlight and rim the food".2 Serious Eats: "a moodier and often more interesting image."1 Its weakness, per Sony: "the subject tends to be dark", which Sony fixes with exposure compensation8 and Dujardin's book (snippet) by bouncing light back onto the front.72 | "leafy herb garnishes (such as mint or basil) as the light can shine through";2 "clear drinks like cocktails, low food like tarts with a shiny glaze or waffles with honey".6 | Lindsay Finnegan for B&H, who puts it "directly opposite the camera" ("works with most kinds of food, making it a great place to start");7 Sony ("To shoot foods or flowers indoors, using back light is recommended");8 Terence Carter ("a fairly conventional food photography rule");9 Nicole S. Young's book (snippet): "Most food photographers agree that the best light for food photography is backlight", her assertion, with no survey shown.74 Against: Anthony Leo of the Institute of Culinary Education, for whom a backlit subject "will appear very dark in front, and can sometimes look hazy or washed out".3 |
| Side-back light 10 to 11, or 1 to 2 (Kopcok) | Darina Kopcok: "Imagine the face of a clock. Side backlighting is when your light is positioned somewhere between 10:00 and 11:00." "Or 1:00 and 2:00, depending on which side of the camera you place your light on."14 Serious Eats describes back light that comes "from above and behind the plate, maybe even a little off to the side."1 | Steam: "You need the light to shine through the steam in order to capture it effectively."14 See steam. | Darina Kopcok;14 Serious Eats.1 |
| Front light from where the camera is | "With this setup, the light shines only in the foreground and falls off into darkness in the back, leaving the image flat."2 Lit this way, says Donna Crous, food "will lack depth and dimension".6 | None named. A flash on the phone or camera is front light: Joanie Simon's book (snippet) says "When the light is hitting your food from the front, you lose the texture and dimension."73 | Avoided by Young ("One direction of light you may want to avoid"),2 Crous ("Never shoot food straight on", in her passage on the direction of light)6 and Joanie Simon as quoted by KaTom ("lit from the sides or the rear").10 Sony only describes how you get it: "If you stand with your back against the window, you can shoot with front light."8 |
| Top light straight above the plate | The photographers read mention it only as a problem (Adobe's page does suggest bouncing a lamp off the ceiling11): Adobe warns against "just your overhead, household lights",11 and a tip Chef's Roll credits to photographer Caren Alpert reaches for wax paper "to diffuse nasty overhead light."23 See why ceiling light fails. | None named. | Our research found no named photographer who recommends it. The one exception is a restaurant emergency: Alex Reichek of Time Out holds a phone torch "straight above the food".26 |
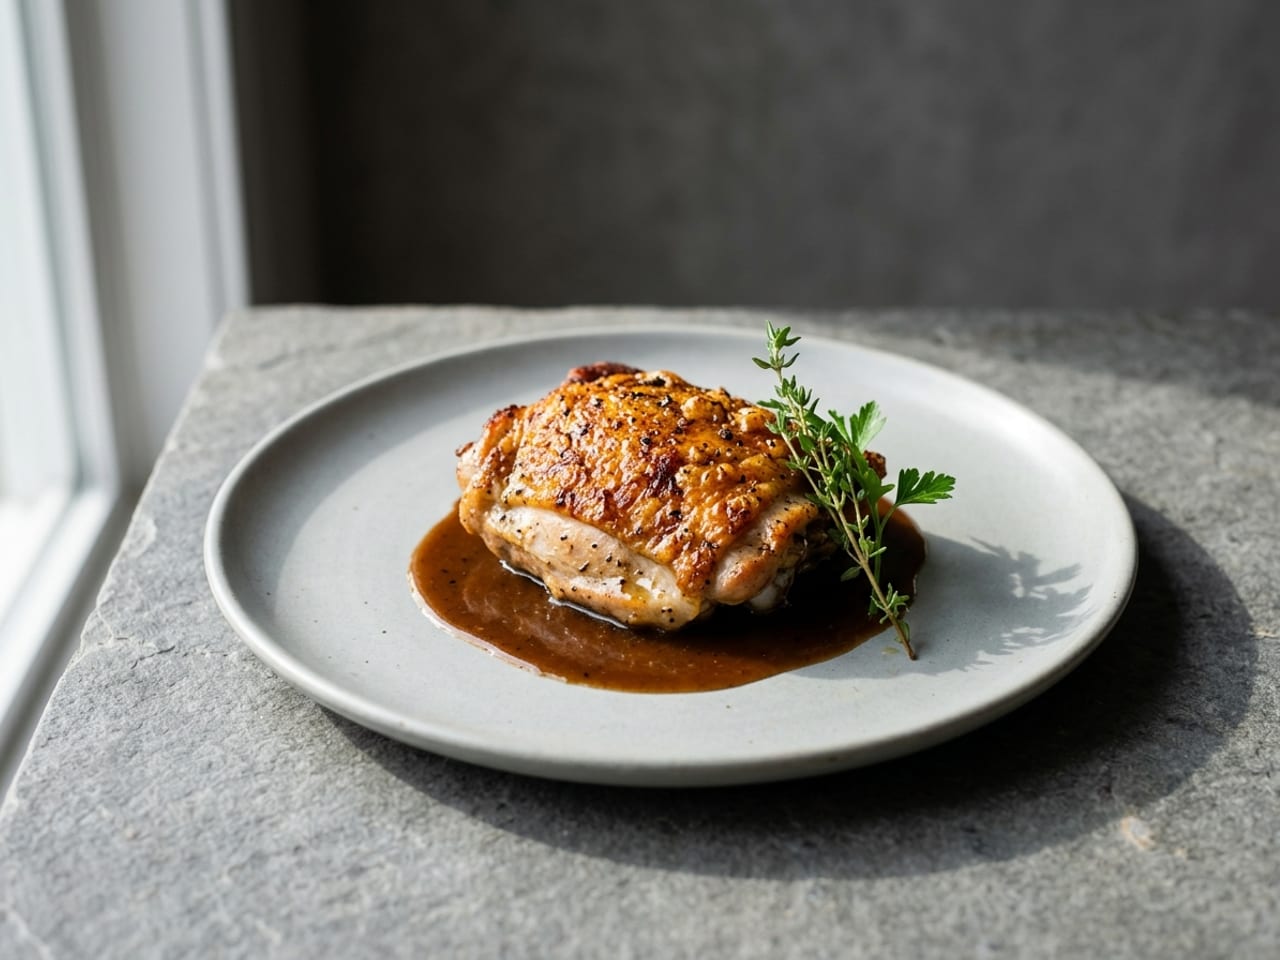
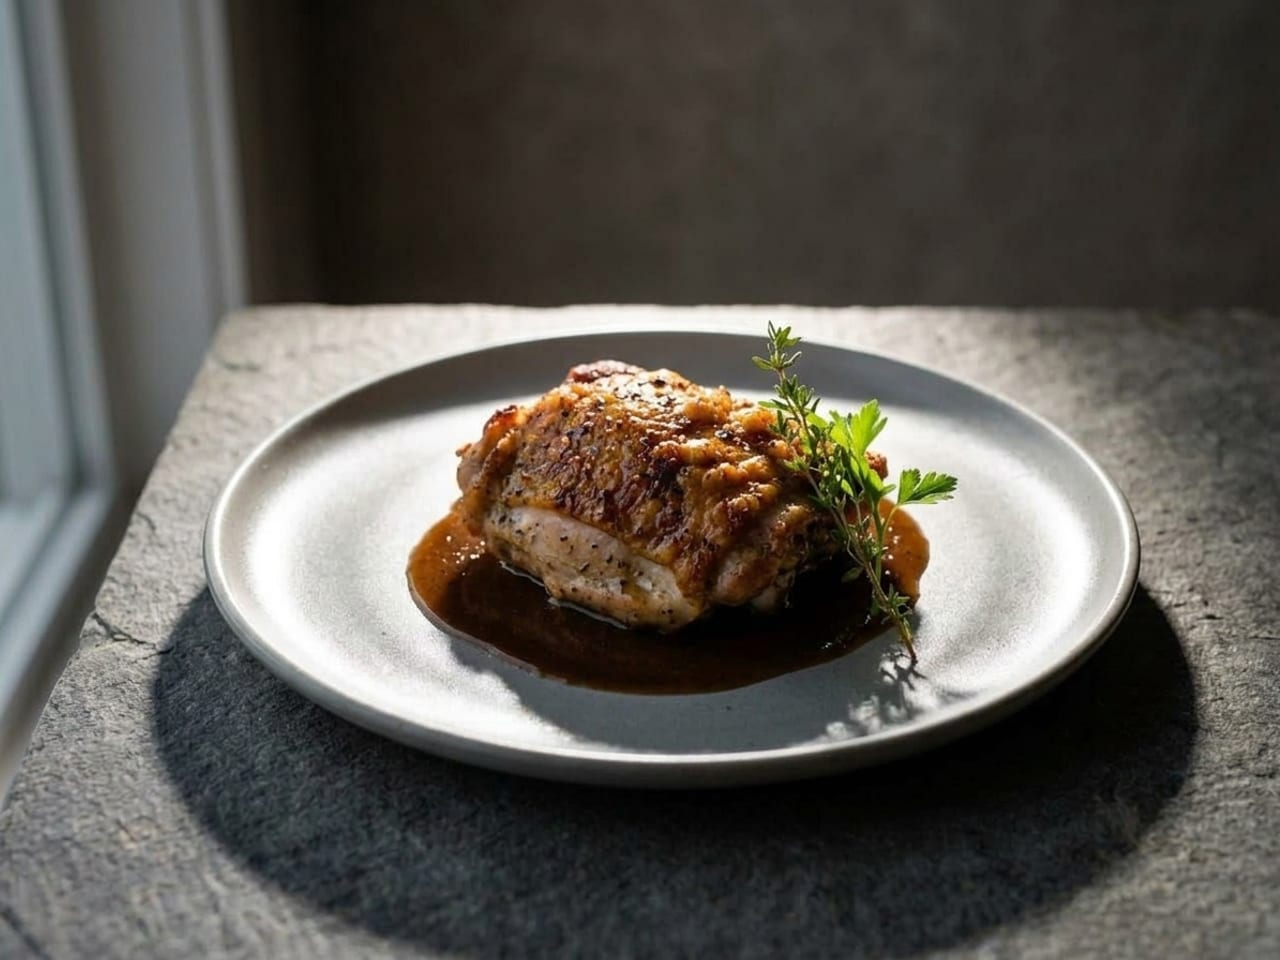
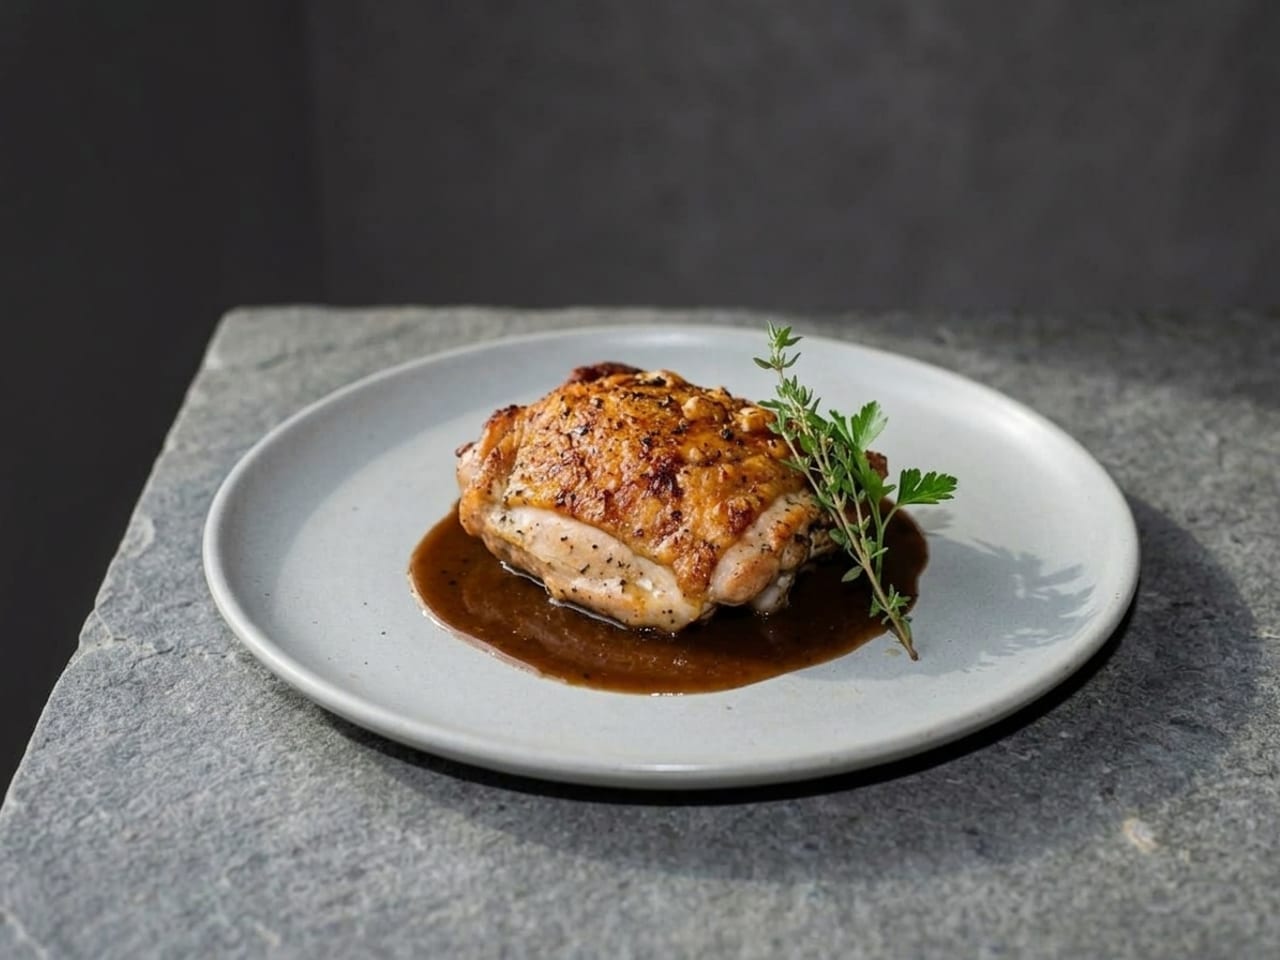
Hard light and soft light, and how to soften a sunny window
- Hard or soft is the size of the lightCambridge in Colour: "When photographers describe light as being "hard" or "soft," or use the term "light quality," they're actually just referring to the size of the light source". A larger one "spans a greater angle across the subject", so more of the subject gets some direct light and the shadows soften.27
- It is the apparent size that counts, so closer is softer"Closer light sources become softer", and "direct sunshine is hard light even though the sun is physically enormous."27 B&H: for food "getting your light closer to the subject is always beneficial, as long as you can keep it out of the frame."7
- Cloud is a diffuser you do not have to hangNikon UK: "Bright but cloudy conditions diffuse the light and stop harsh shadows."5 Adobe: "Overcast and cloudy days can be ideal for photographing food".11 Light can be too soft as well: outside on a fully overcast day it is "effectively enormous in size and erases all shadows."27
- What to put over a sunny windowA white sheet,1, 13 which in Serious Eats' words "diffuses the light without adding the kind of tint you'd get from, say, a colorful curtain";1 a white curtain;11, 27 baking parchment or greaseproof paper, held with masking tape, which is less likely to pull paint away;21 "a thin white bedsheet", from a gear maker's blog.22
- Which windowRupa Nagamootoo: "In the UK and across much of Europe, north-facing windows offer ideal soft light. In the Southern Hemisphere, south-facing windows are your go-to."4 Serious Eats names no compass point, only a window "outside the range of direct sunlight."1 Donna Crous's way to choose: carry an egg from window to window and look for a "feathered shadow falling across it". 6
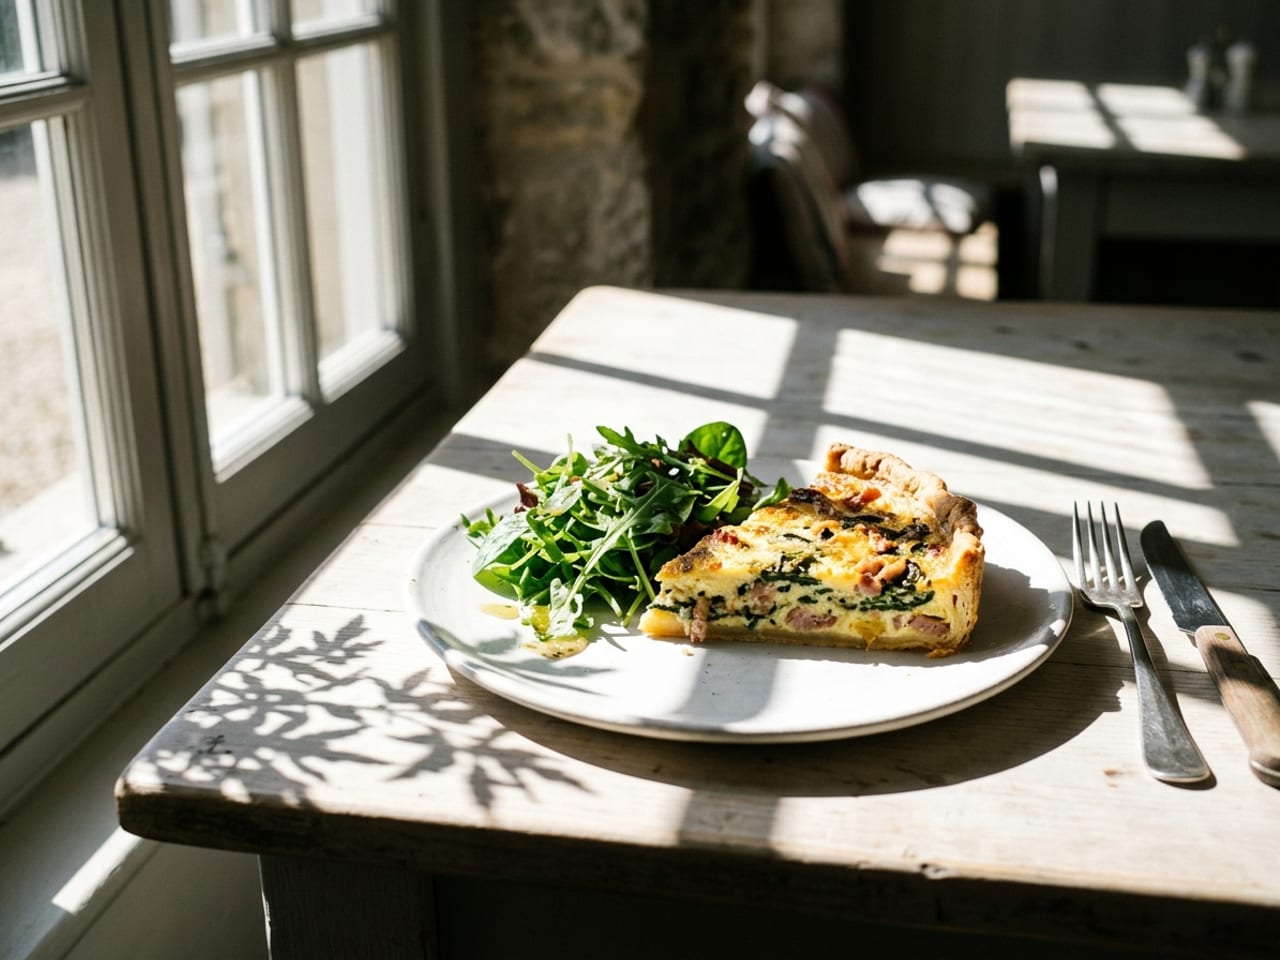
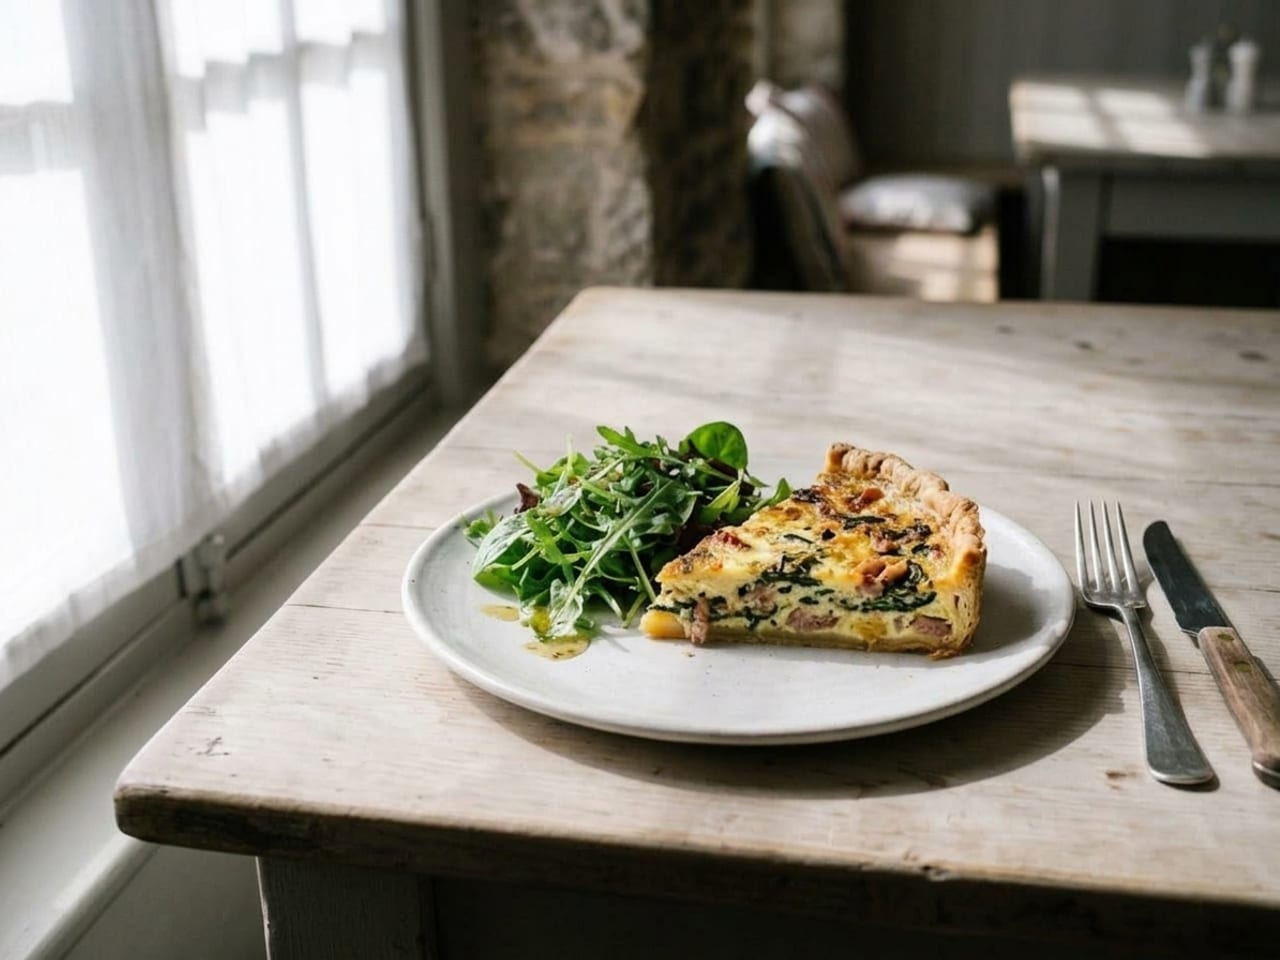
Fill and negative fill: a white card, or a black one
- A white card opposite the light"A bounce card, or reflector, is just a white surface that can be positioned opposite your light source to literally bounce light waves back onto your subject and fill in any dark areas or shadows."1 What the sources use: white posterboard,1 "a simple white napkin or piece of card",4 white cardboard,5 "a piece of tinfoil or a white card",6 "Heavy white paper or a white sheet".7
- Most sources fill to soften the shadow, not to remove itDonna Crous: "Shadows are your friends, but too much shadow can make it heavy, so finding a happy balance is key."6 B&H on the material: "White is softer, while silver renders a brighter and harsher reflection."7 Adobe is the outlier among the pages read: with lamps it suggests lighting from "opposite sides of your subject" to "eliminate most shadows."11
- With back light, bounce toward the frontTerence Carter uses "a menu, a sheet of paper, a napkin, or a white scarf to reflect light into the front of the dish".9 Helene Dujardin's book (snippets) bounces light "back onto the front and/or sides of your subject" and sets a foam board "at four or five o'clock"; the snippet does not show where her light and camera stood, so that hour is not on our diagram.72
- Negative fill: a black card takes light awaySerious Eats: "Sometimes you might actually want to remove some light from your subject to create a moodier effect, in which case you'd use a black board to absorb the light instead."1 Rachel Korinek calls these "Negative Fill Cards (Black Foam Boards)" and puts the first "on the opposite side of the light source to reduce light from bouncing back".20 Short of a black card, B&H gets "stronger contrast" from "minimal fill".7
Food photography lighting setup at home: the window, step by step
- By day, choose a window with no sun falling on the table.1 Rupa Nagamootoo: "Avoid direct sunbeams".4
- "switch off every indoor light around you. That includes overhead spotlights, fluorescent bulbs, and lamps even in the background."4
- For side light, put the plate beside the window and stand so the window is to your side too, "with the window out of frame."4 For back light, turn until the window is behind the plate: "If you face the camera toward the window, you can shoot with back light."8
- If sun reaches the table, cover the glass with something white and thin.
- "You can also use a piece of white cardboard as a reflector opposite the window."5
- "Move the dish around to see how the light hits individual elements on the plate differently."5
White balance: why the plate looks orange, and how to fix it
- Your eye corrects the colour of light; the camera has to be told"Light in restaurants, and often homes, is usually either incandescent or candlelight, both of which are quite yellow. Your eyes compensate for this automatically, but your camera's sensor doesn't. Unless you adjust your white balance, photos will have an odd color cast".1
- Which light gives which castAdobe: an overcast sky gives "more of a blue tone", "typical tungsten light bulbs" a cast "that shows up as more yellow or orange", and "certain types of fluorescent lights can give your photos a green tint."12 Anthony Leo on fluorescent lights: they "cast yellow or blue tones that make food look sickly."3
- Do not mix two kinds of light"Multiple light sources can cast different colored tints, which makes adjusting the white balance nearly impossible."1 Under mixed light a camera's auto white balance "usually calculates an average color temperature for the entire scene".28 Kenton Waltz, quoted by Adobe: a bulb beside an overcast window leaves "one half of your photo really warm and the other half really cold. In post, it's hard to fix that."12 So: one kind of light, and the others off.1, 4
- Setting it right, before or afterBefore: the phone controls row for white balance. After: Serious Eats clicks the white balance tool on "a spot in your image that should be a neutral white or gray (napkins, menus, and shadows on plates work well for this)."1 Shawn Chippendale: "The easiest way to tell if it's correct is to look at what should be white."66 Fluorescent and other artificial light "may require significant green-magenta adjustments" as well.28
- When to leave the warmth inGrace Rivera, quoted by Adobe: "Say you're shooting in a dimly lit bar or restaurant. That's the type of thing where you want to convey that mood. You may want to preserve the color of the ambient light rather than correct it".12 What studies of room light found is under the research.
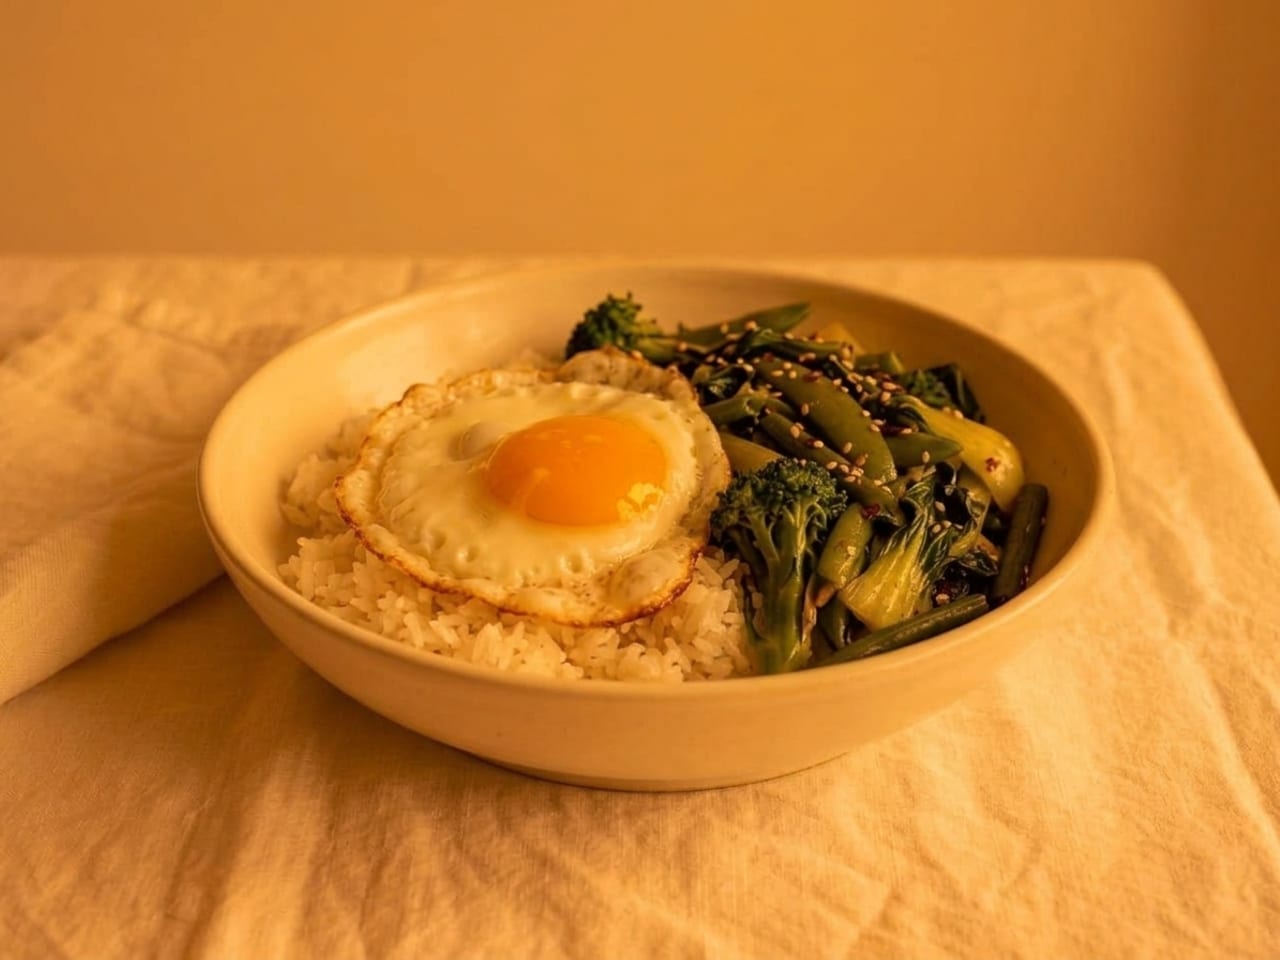
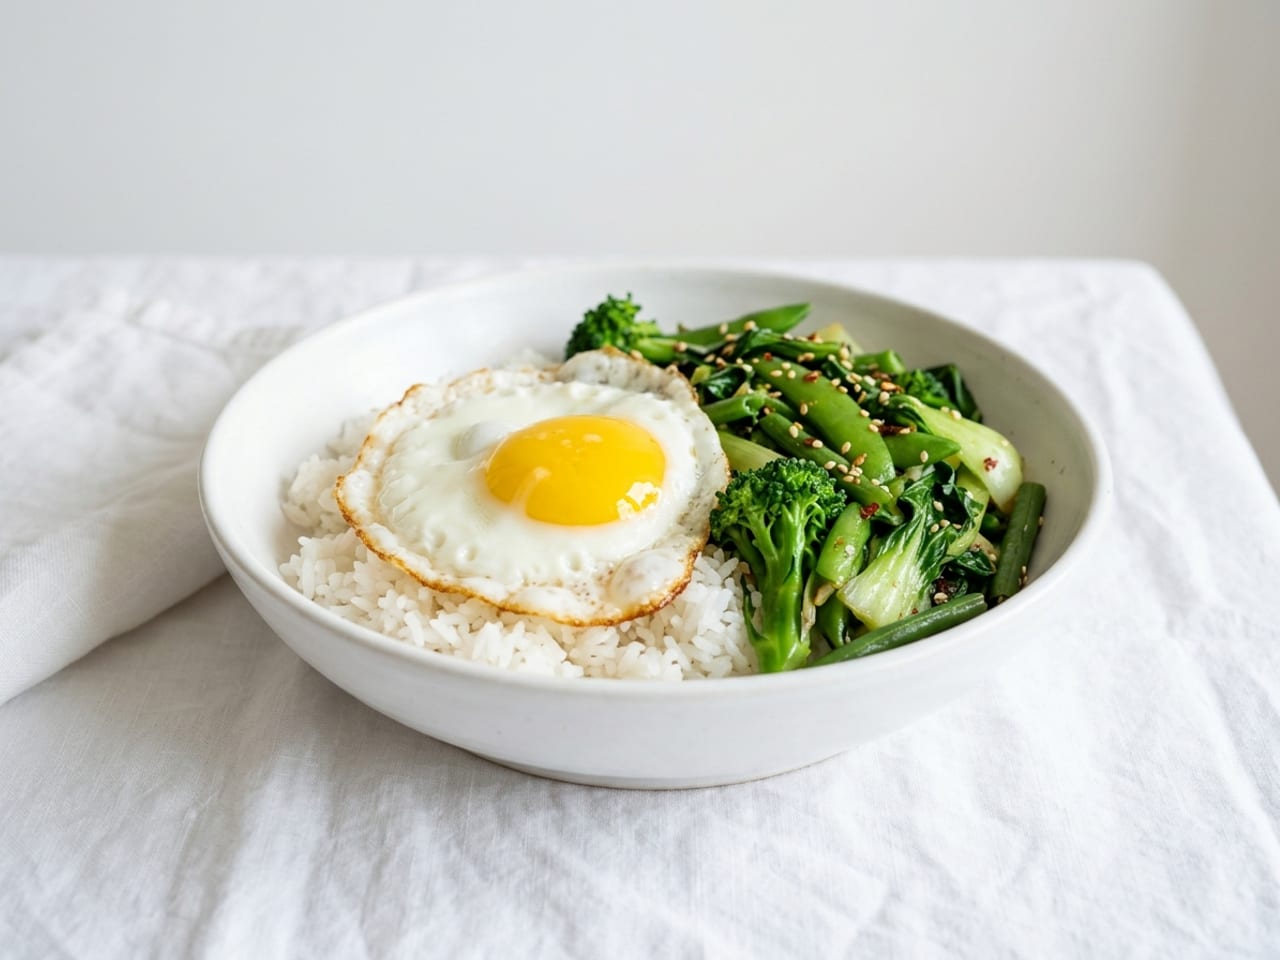
Colour temperature in Kelvin, authority by authority
There is no single figure for daylight or for a household bulb. Camera presets are each maker's convention, and the books and tutorials print ranges. Every row is one source's own figures.
| Whose figure | Daylight | Cloud and shade | Household bulb | Also |
|---|---|---|---|---|
| Cambridge in Colour photography tutorial | 5000-6500 K (clear sky, sun overhead) | 6500-8000 K moderately overcast; 9000-10000 K shade or heavily overcast | 2500-3500 K household tungsten bulb; 1000-2000 K candlelight | "5000 K produces roughly neutral light".28 |
| Nikon, Z 30 manual camera presets | Direct sunlight, approx. 5200 K | Cloudy, approx. 6000 K; Shade, approx. 8000 K | Incandescent, approx. 3000 K | Flash, approx. 5400 K.32 |
| Canon, EOS-1D X Mark III manual camera presets | Daylight, 5200 | Cloudy, twilight, sunset, 6000; Shade, 7000 | Tungsten light, 3200 | White fluorescent light, 4000.33 |
| US Department of Energy home lighting advice | calls 3600 to 5500 K "cool" | not given | calls 2700 to 3000 K "warm" | Recommends 2700 to 3600 K for most indoor general and task lighting.29 |
| Joanie Simon, book (snippet) food photographer | "brilliant white daylight at 5,600 Kelvin" | not in the snippets | overhead incandescent lights "at 2,700 Kelvin" | Her scale runs from candlelight at 1,000 Kelvin to "the cool blue color of twilight at 10,000 Kelvin".73 |
| Andrew Scrivani, book (snippet) food photographer | "Cool white light reads about 5000 to 6500 K, and is what we refer to as daylight balanced" | not given | warm white light "reads from 2800 to 3500 kelvins" | "Warm white light is terrible for food."75 |
| Corinna Gissemann, book (snippet) food photographer | "around 5500 K" under a clear blue sky | "a cloudy sky measures around 7600 K" | not in the snippet | Read as snippets only.76 |
| Food Blogger Pro advice on a lamp to buy | "Daylight balanced (5200-5600K)" | not given | not given | Its figure for a beginner's LED panel.16 |
CRI: how well a lamp shows colour
The US Department of Energy defines the Color Rendering Index as a scale from 1 to 100 of "a light source's ability to render colors the same way sunlight does", and says colour rendition "is generally considered to be a more important lighting quality than color temperature."29 None of the lighting authorities read says anything about CRI and food; the food figure below is a blog's.
| Who | CRI | In their words |
|---|---|---|
| US Department of Energy, Energy Saver page | 80 or higher | "considered acceptable for most indoor residential applications."29 |
| US Department of Energy, 2012 LED fact sheet | 70s, 80s, 90s | "a source with a CRI in the 70s would be considered acceptable for interior applications, whereas the 80s would be considered good and the 90s excellent." It adds that "two light sources with the same CCT and CRI may not render colors the same way".30 |
| Waveform Lighting (sells high-CRI lamps) | below 80; 90 and above | "CRI values that are 90 and above are considered excellent, while scores below 80 are generally considered poor."31 |
| Food Blogger Pro (a light for food photography) | 90+ | "CRI (Color Rendering Index) Rating of 90+". The page ties the rating to "no flickering", which is not what the Department of Energy's definition measures (our comparison).16, 29 |
Food photography at night: one lamp, made large
After dark there is no window to use. The sources' answer is to build one: a single light, a diffuser in front of it, a white card opposite, and every other light off.
- One light, made largeFood Blogger Pro works with continuous light "because it's the most similar to natural light", its favourite kind "is an LED panel", and it puts a diffuser in front: "Diffusers take the small light source from your LED panel and diffuse it into a big, soft light source".16 The Institute of Culinary Education's article reports that Anthony Leo recommends "a flash or LED with a diffuser (like an umbrella or softbox)", the writer's wording.3 One is enough: "You can get away with using a single light with a softbox".7 Serious Eats wrote in 2019 that most of its own pictures were shot this way, "to simulate a nice big window".1 Our research found no source that gives beginners a wattage; the few wattages it found in print each describe a photographer's own kit.
- Where it goes: beside the plate or behind it"Position the light source behind or to the side of your food just as you would with window lighting".16 B&H places it "behind your chosen subject, opposite the camera, to mimic what a window would do, and then add a reflector or fill light to brighten the shadows."7
- Close to the food, with the diffuser betweenUsnea Lebendig, summarising a Joanie Simon video for PictureCorrect: "all Simon uses is a speedlight and a diffusion panel", and "Notice how close the diffusion panel is to the subject."17 B&H pushes a 2 x 3 ft softbox (about 61 x 91 cm, our conversion) "as close to the subject as possible".7 A different distance, lamp to diffuser, also counts: "the farther the diffuser is from the light, the softer the light will be."16
- Make it the only light in the room"Continuous artificial light is not bright enough to block any other ambient light. Close your window curtains and turn off overhead lights to block out other lights that might affect the white balance of your photographs."16 The shadow side is handled as by day, with white foam board or black card: fill.16
- If all you have is a household lamp (ours)Ours, not a source's. The same rules point one way: make the lamp large by standing a white sheet or baking paper between it and the plate, never draped over the lamp or touching the bulb or shade, and never left unattended; put the lamp beside the plate, add a white card opposite, switch every other light off, and expect a warm cast to correct, because the household-bulb figures in the Kelvin table sit far below the daylight ones.
Restaurant food photography: dark rooms without the flash
- Flash off, for the food and for the roomRebecca Hale: "be sure to turn off your flash, which can look pretty harsh."13 Stan Horaczek of Popular Photography: "Firing a strobe of any kind is going to be immediately conspicuous and annoying to some other diners."25 Makiko Itoh: "Even if you end up with an underexposed picture, it will still be better than flash-lit".24
- The phone torch through a napkin: one sourceAlex Reichek of Time Out: "use your friend's iPhone Flashlight app. Play around and hold it straight above the food you are photographing. If the light is too harsh, put a napkin over it." 26 It is the only named source our research found for the trick, and it lights from the top, where the photographers quoted here put the light beside or behind the plate.
- Be quick, and dim the screenStan Horaczek calls phone screens "big, rectangular flashlights": "turn the brightness down and don't leave the screen on to admire your handiwork." He allows one or two shots.25
Why the ceiling light and the phone's flash fail
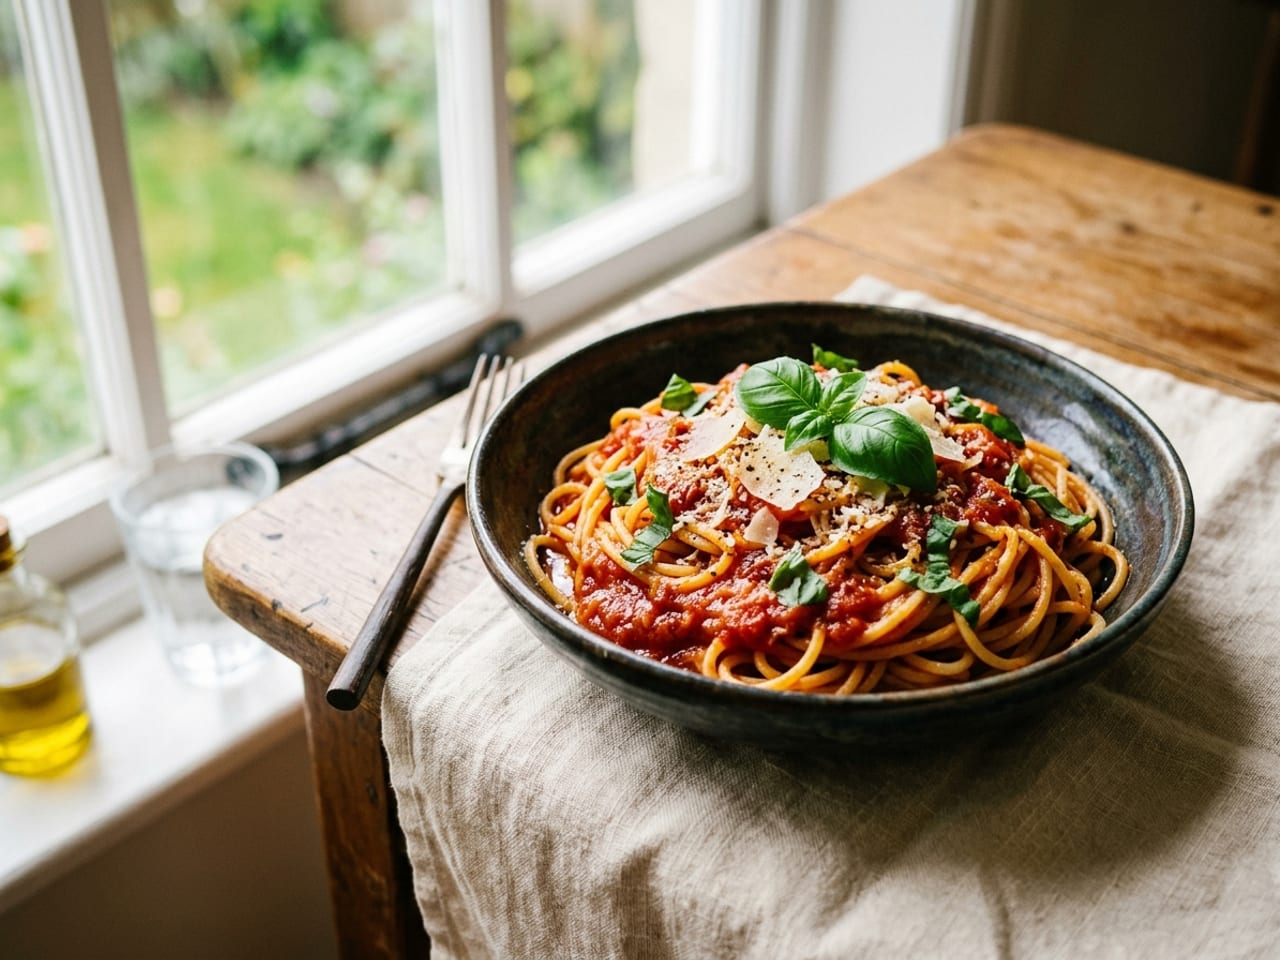
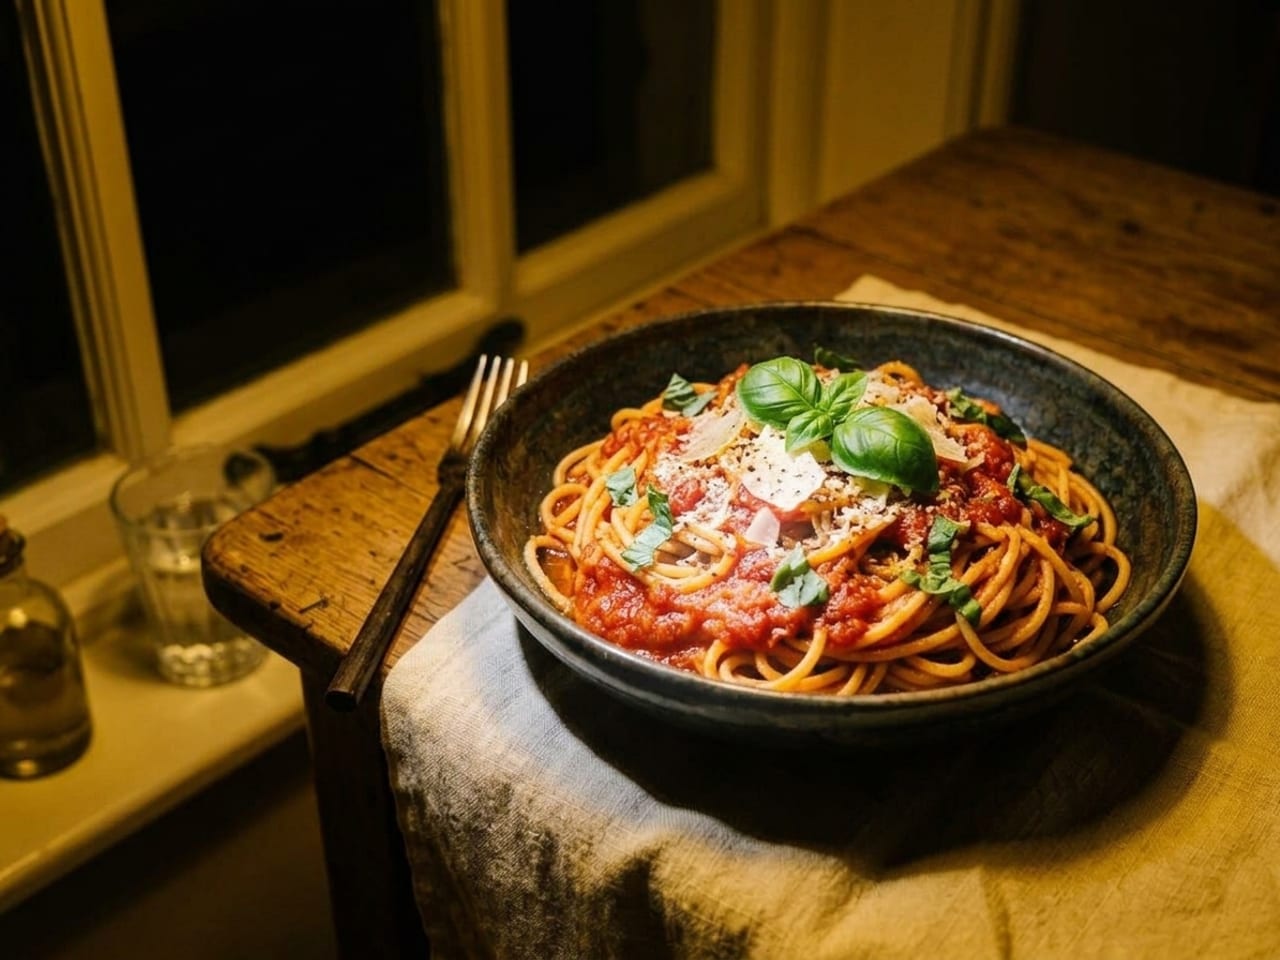 Ceiling lightWindow
- What the sources say is wrong with the ceiling lightColour: "unwanted orange or yellow tinges".11 Shadows: "awkward shadows"7 and, with a second source, "cross shadows".13 None of the sources read explains it by direction. Ours: a ceiling lamp is top light from a small source, the two things the sections above warn about.
- What they say is wrong with the phone's flash"Flash photos of food create harsh reflections and glare as well as funny-looking fall-off".1 Joanie Simon's book (snippet): "the camera's flash is a very small light source that creates harsh lighting."73 Stuart Ovenden of BBC Good Food: "pouring in light front-on will flatten your dish and dispel any delicate natural shadows".70
- "Never" means the built-in flash, fired straight at the foodBounced, diffused or moved off the camera, flash is another matter. Serious Eats, whose line on the built-in flash is "Don't use it", goes on: "Hotshoe flashes, which slide onto the top of your DSLR, can work if you have something big and white to bounce off".1 The Institute of Culinary Education's article has Anthony Leo recommending "a flash or LED with a diffuser", in the writer's words.3 Terence Carter: professionals "will often use off-camera flash units mounted in large soft boxes".9 The objection is to a small light at the lens, not to flash as such (our summary).
The best angle for food photography: overhead, three-quarter or straight on
"There are three main camera angles used when photographing food: overhead, three-quarters angle, or straight on."63 This page names them in words, because writers count degrees two ways: Gastrostoria writes "90-degrees for overhead",63 Darina Kopcok "Get down low over the table and shoot your scene at 90 degrees", which we read as a low view from the side.62
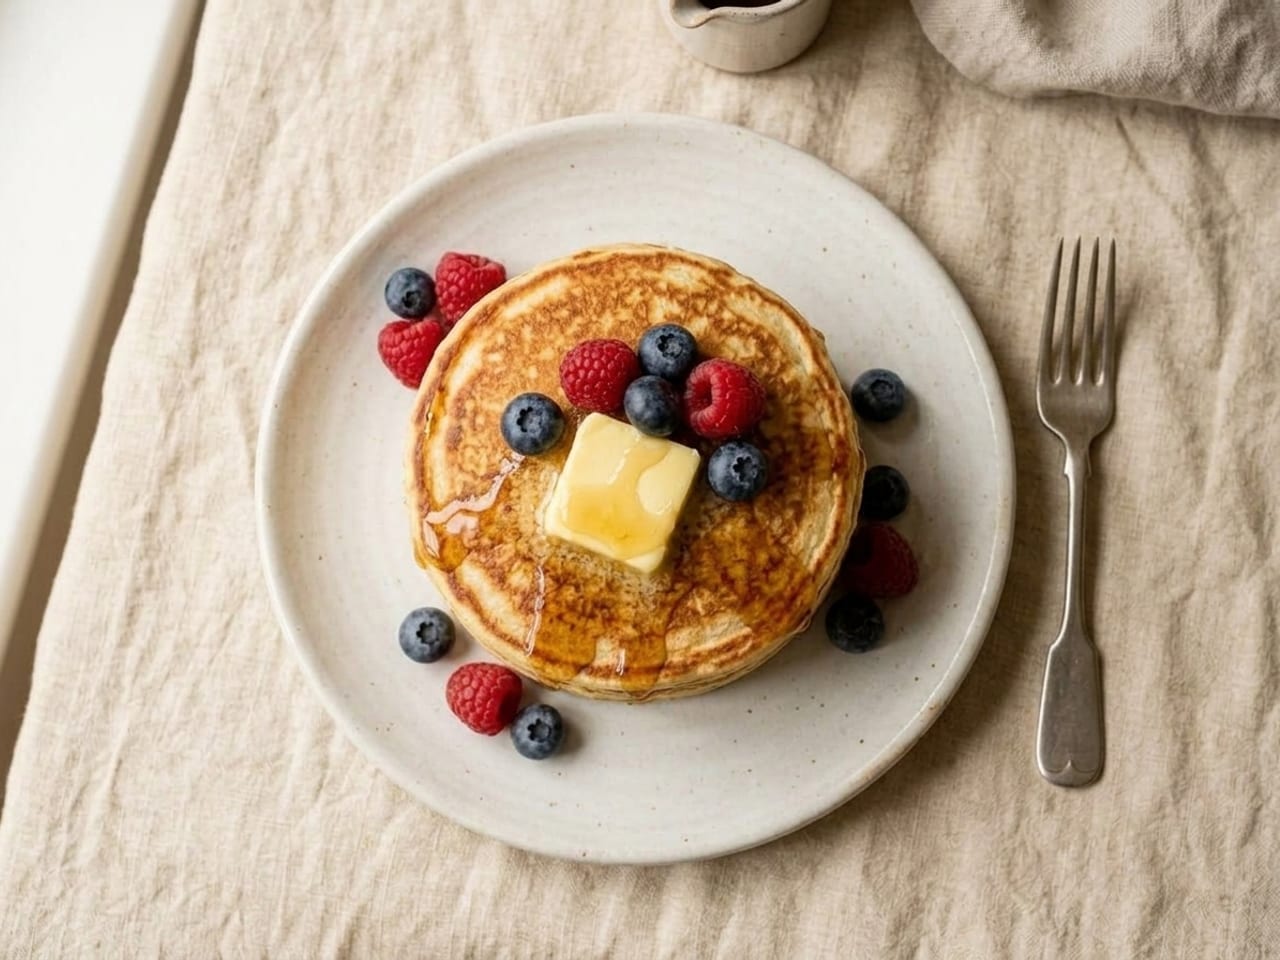
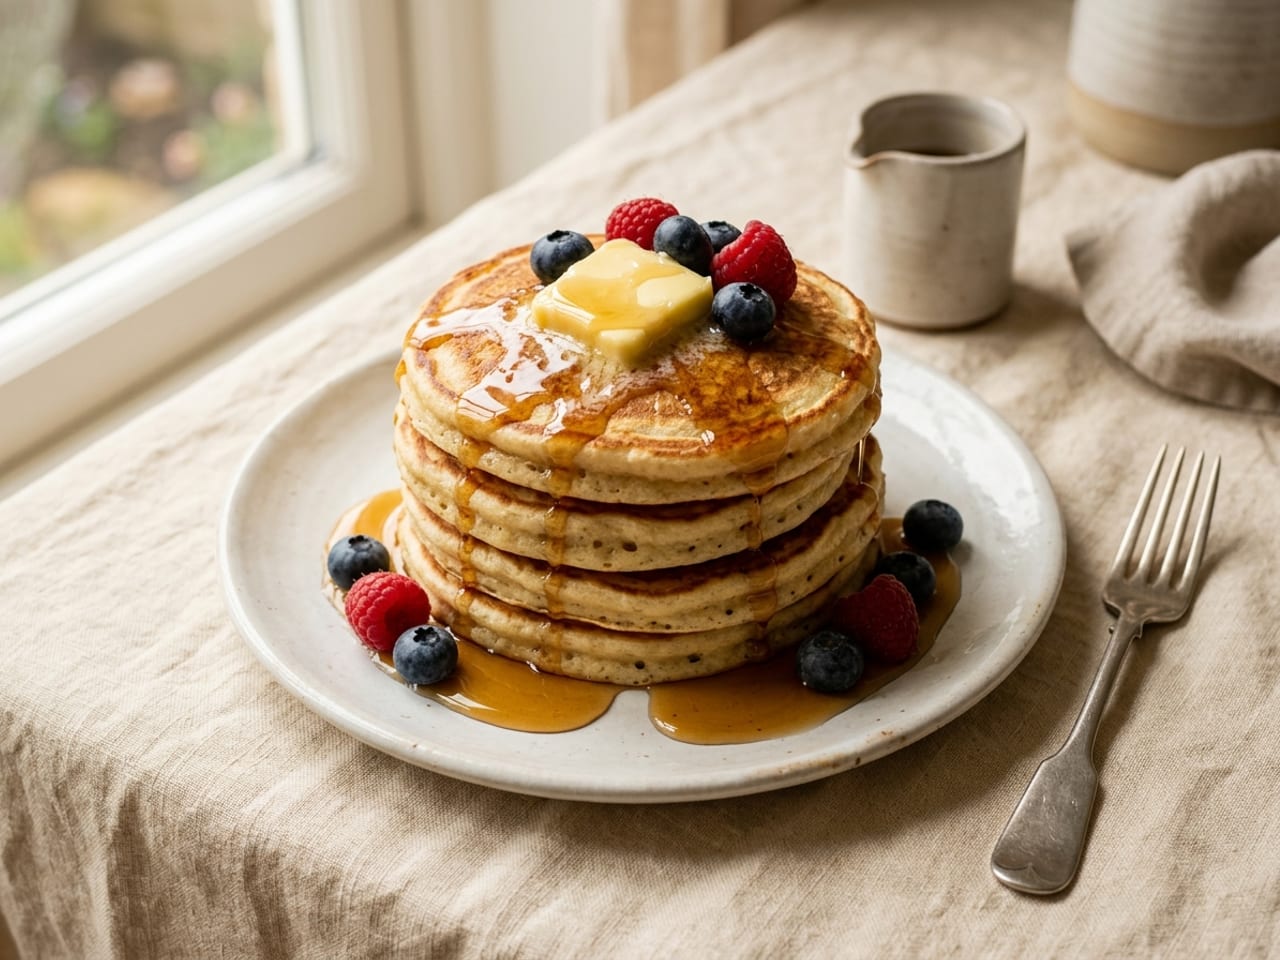
Is the 45-degree angle good on a phone? 3 positions
The objection is the lens, not the view: "most smartphone cameras use wide-angle lenses", and at a three-quarter angle that can distort the plate.62 Rachel Korinek was still using an iPhone 5 when she wrote her post,59 and our research found no source that repeats the comparison on a current phone with a telephoto camera.
| Position | Who holds it, in their words |
|---|---|
| Avoid it on a phone | Rachel Korinek, 2017, who was using an iPhone 5 at the time: "the angle that you want to stick away from when shooting food with your iPhone is the 45-degree angle", and "this can even extend to the 25-75 degrees too."59 Darina Kopcok, 2022: it "rarely works. It's an easy way to create distortion issues, so I recommend you avoid it whenever possible."62 Gastrostoria, 2018: "If you're shooting with your phone, use the overhead or straight-on angle." 63 |
| Use it; no phone caveat given | The Institute of Culinary Education, 2026: a 45-degree angle "mimics how diners view food on the table" and "works for a wide variety of foods."64 Serious Eats, 2019: a tall dish of ice cream "might benefit from a 45° angle".1 Michael Natkin, in a 2011 interview about cameras: "Get some safe shots first, covering the whole plate from above, 45 degrees and horizontal."65 |
| In between: step back first | Darina Kopcok: "try taking a step back and switching over to your smartphone camera's telephoto lens."62 Rachel Korinek: "don't get too close to your subject. Shoot further back and crop in during post."59 |
Dish by dish: which angle, which light
The angle column is what the sources give. The light column is filled only where a source pairs a direction with that food; no source pairs both for every dish, and we have not filled the gaps.
| The dish | Camera angle | Light the sources pair with it |
|---|---|---|
| Flat and round: pizza, pie, tart | From directly above.1 The Institute of Culinary Education's article, reporting Anthony Leo: overhead "works well for flat foods like pizza, soup or pie."64 Rachel Korinek, writing for cameras, shoots flat food "somewhere between straight above and a 75 degree angle", her degrees evidently counted up from the table (our reading).61 | Back light for "tarts with a shiny glaze".6 Nothing paired for pizza or pie. |
| Tall and layered: burger, sandwich, pancake stack, layer cake | Straight on, at table level.1 Gastrostoria: "the bun or the top piece of bread hides what is inside, so taking the shot from anywhere above the food doesn't make sense."63 Stuart Ovenden: tiered cakes "often need to be shot from a lower angle."70 | Two books read as snippets, so the lead-in to each sentence was not seen: Joanie Simon writes of "side light that rakes across the front of the food, revealing its texture" and adds that there is no one-size-fits-all setup for shooting straight on;73 Nicole S. Young writes "I prefer this light when I am photographing the food at eye-level", which we read as her back light.74 |
| A scoop or a mound: ice cream in a tall dish | "a 45° angle to keep the focus on the three-dimensional contours of the scoop."1 On a phone, see the dispute above. | None paired in the sources read. |
| In a bowl: soup, salad, pasta | Rachel Korinek: liquids, soups, salads and puddings take their angle from "the food styling prop in which they are presented."61 Gastrostoria: "For a salad served in a bowl, you want to see deeper into the bowl. This means choosing a 45-degree angle rather than a 30-degree angle."63 The Institute of Culinary Education's article lists soup with the overhead foods.64 | Side light for a flat liquid surface, because it "tends to prevent distracting reflections on the liquid itself."2 |
| Drinks | No angle is given for drinks in the sources read. | Split. Back light for "clear drinks like cocktails";6 side light for food with a reflective surface "such as soup or beverages", in Nicole S. Young's book (snippet).74 Our reading: back light for glow through the glass, side light to keep reflections off the surface. |
| A whole table, a board, a spread | Overhead: "a zoomed-out bird's-eye view of a table filled with different cheeses can paint a more interesting and diverse picture than showing a single slice."1 Gastrostoria: "good for fitting several elements into a scene, like in a tablescape."63 | None paired in the sources read. |
How to take good food photos with an iPhone or any phone: the settings, maker by maker
Menu names are quoted from the makers' own help pages as read on 6 October 2026: Apple's iPhone User Guide at iOS 27, Google's Pixel Camera Help (one of its pages names Pixel 11 models, another stops at Pixel 10 Pro) and Samsung's US and UK support pages, which name no software version. Menus move between versions and models, so treat the names as a guide to what to look for.
| Control | iPhone | Pixel | Galaxy |
|---|---|---|---|
| Focus | "Tap the screen where you want to move the focus area."35 | "Tap on the subject. A white circle appears and moves on the screen with the subject."48 | No tap-to-focus step on the two Samsung pages read. The US page lists a setting, "Tracking auto-focus: Keep a moving subject in focus."51 |
| Brightness | Drag the control next to the focus area up or down (step paraphrased; Apple prints an icon in it). A separate Exposure slider in the camera tools holds its setting "until the next time you open Camera."35 | On Pixel 4a 5G and later, Brightness and Shadows sliders (our paraphrase of steps that print icons); on Pixel 4 and earlier, "tap and hold your screen."47 | Pro mode: "Manually adjust the ISO sensitivity, exposure value, white balance, and color tone while taking pictures."51 |
| Lock focus and brightness | "touch and hold the focus area until you see AE/AF Lock; tap the screen to unlock settings."35 | A Lock control holds "the focus and exposure on a subject that moves" (step paraphrased).48 | Not described on the two Samsung pages read. |
| Flash | Automatic unless you change it: the Flash control switches "between Auto, On, or Off."35 | "When the camera flash is on, the Automatic Night Sight doesn't work."47 | "Flash: Enable or disable the flash or automatic flash."51 |
| Grid and level | In Settings: "Tap Camera, then turn on Grid and Level."35 | "Grid type", under More settings.49 With Framing hints, "A yellow line and a white line appear in the middle of the screen."48 For flat lays, Google's store article: "Align the central crosshairs to make sure you're shooting from directly above."50 | "Grid lines: Display viewfinder grid lines to help compose a picture or video."51 |
| Lens and zoom | "On supported models, tap 0.5x, 1x, 2.5x, 3x, 4x, 5x, or 8x to quickly zoom in or out (depending on your model)."34 "On supported models, the default for the 1x Main camera lens is 24 mm."42 | For a subject far away: "Tap the 2x or 5x zoom button above the shutter." As you zoom, the phone "automatically selects which lens to use."48 | Lens buttons are not described on the two Samsung pages read. |
| Low light | On supported models, "Night mode automatically brightens photos and captures more detail in low light." It "turns on automatically." "Tip: Use a tripod for even more detailed Night mode photos."36 | "When you take a photo in low-light conditions and the Photo mode or Portrait mode is on, Night Sight automatically turns on." Then "Hold still for a few seconds while your device captures the photo."47 And, in its panorama tips: "The wide (1x) camera is the best performer in low light."48 | Night mode: "your phone should be kept as steady as possible", and "If possible, use a tripod to get the perfect picture."52 |
| Close-ups | On supported models, as close as 2 centimetres (about 0.8 inch, our conversion): "Camera will automatically switch to the Ultra Wide camera to enable macro photography." A control that appears on screen turns the automatic switch off (step paraphrased).37 | Macro Focus, "only available on Pixel 7 Pro, Pixel 8, Pixel 8 Pro, Pixel 9 and later."48 | Not described on the two Samsung pages read. |
| Background blur | Portrait mode, with a "Depth Control slider to adjust the level of background blur".38 On some models the rear camera "must detect a person's face to take a Portrait mode photo."39 | Portrait Mode "blurs the background to create a sense of depth" (store article).50 | "Portrait: Add and adjust background effects for photos."51 The UK page calls it Live focus, for adjusting "the level of background blur in real time." In Food mode, "Icons to adjust the colour and add a radial blur will appear if available".52 |
| Food mode | No food mode on the Apple pages read. | No food mode on the Google pages read. | "Food: Take pictures that emphasize the vivid colors of food."51 It "will automatically adjust the colours of food in the frame, making them appear more vibrant".52 Both pages say the modes vary by model.51, 52 |
| White balance | Manual controls named "Lens Aperture, Shutter Speed, or White Balance", described for iPhone 18 Pro models.43 | The help page offers "brightness, shadows, and temperature of the color hue";47 the store article calls the last one white balance.50 | Pro mode, in the UK page's words: "ISO, shutter speed, exposure, filters, focus and white balance."52 |
- Wipe the lens firstRupa Nagamootoo: "In food photography, we're often working around steam, flour, oil, sauce and touching our phones with messy hands. That leaves smudges and condensation, which can make your photos look hazy and dull."67 Apple's camera troubleshooting page says to clean the lenses with "a soft, slightly damp, lint-free cloth".46 Some phones warn you: "On supported models, iPhone detects if your lens is smudged and suggests you clean it",41 and on a Pixel "You may get a warning message if your camera senses that the lens is dirty."49
- The main camera is a wide lens"most smartphone cameras use wide-angle lenses".62 Rachel Korinek: "When you get close to your subject with a wide angle lens you get perspective distortion": "The objects that are close to the lens appear abnormally large relative to more distant objects."59 Her fixes are a narrower lens, or to "get further from your subject and crop in (if possible)."60 Apple's guide says that on supported models Lens Correction, on by default, "adjusts photos taken with the front camera or Ultra Wide camera for more natural-looking results."41 Reading that as a sign the 0.5x lens distorts more is ours; no source read says so about food. Also ours: no named source says which lens button to use for a plate; from the sources above we would start at 1x, step back before reaching for 0.5x, and try a longer lens button (2x or 5x on Google's page, 2.5x and up on Apple's iOS 27 list) from further away for a three-quarter view.
- Zoom or move: both positionsShawn Steiner for B&H, 2017: "Most cameras use a digital zoom that simply crops into the photo and enlarges it, resulting in reduced resolution", so avoid it "unless you have a dual camera/lens system that provides an optical telephoto".58 Google's engineers, 2018, agree about the old kind, where "a small crop of a single image is scaled up to produce a much larger image", and then say that on the Pixel 3, "if you pinch-zoom before pressing the shutter, you'll get a lot more details in your picture than if you crop afterwards."56 So the answer depends on the phone (our reading).
- Focus toward the front, lock it, then set the brightnessGastrostoria: "My recommendation is that you focus towards the front of the food."63 Rupa Nagamootoo, on an iPhone: "tap and hold on the screen on your hero dish until you see a square appear, and then the AE/AF LOCK." After that, "Swipe up = brighter" and "Swipe down = darker", and "Every time you reframe or move your phone and go to take another shot, check your focus again."67 Which way to err, from Serious Eats, writing about bright sun: "you can usually add more brightness to a photo without many negative consequences; removing brightness, on the other hand, tends to leave an image muted and anemic."1 Our research found no source that puts a number of stops on it.
- HDR and Night mode: automatic on iPhone and PixelApple: with HDR the camera "takes several photos in rapid succession at different exposures and blends them together to bring more highlight and shadow detail to your photos", and a manual switch is documented only "On iPhone 11 models, iPhone SE (2nd generation), and iPhone 12".40 Our research found no named source that says when to turn HDR or Night mode off for food.
- Portrait mode on food: both positionsFor: Rupa Nagamootoo ("It adds a beautiful soft blur behind your dish, helping it pop out from the background")67 and Google's store article.50 Reservations: Google's own engineers wrote of the 2017 Pixel 2 that when you point the camera at "a small object instead of a person (like a flower or food), then our neural network can't find a face and won't produce a useful segmentation mask"; the phone then works from depth alone, which "works well only for objects that are roughly less than a meter away" (about 3 ft, our conversion).57 And on "iPhone XR, iPhone SE (2nd generation) and later, and iPhone 16e, the rear-facing camera must detect a person's face", so those cannot blur a plate this way.39 On an iPhone the effect can be taken off afterwards: "you can remove the effect if you want to see the image without it."38
- Hold stillMichael Natkin, in 2011 and speaking of cameras: "If you can't use a tripod, brace it against a chair, wall, or sleeping giraffe. The food isn't going anywhere, so as long as the camera is still, there is no reason the shot should be blurry."65 Shawn Chippendale: "Consider using a tripod if you can't avoid shaking and get blurry photos".66
Composition and backgrounds, briefly
Composition on the plate itself belongs to Plating 101 and how to plate food, dish by dish. These are the points about the frame around it.
- The rule of thirds is a suggestionSerious Eats describes the nine-part grid and adds: "we like to think of it as a suggestion more than an actual rule."1 Shawn Chippendale: "It's OK to center things, too." 66 In the one study our research found, photographs that kept to it more closely were rated slightly more appealing and drew slightly more likes, with no difference in comments or sharing intention.87
- Leave the eye somewhere to restDarina Kopcok: "try to include an empty area or two where the eye can rest for a brief moment as it moves through the image. (This is known as negative space.)"62
- Fewer props, a clear background"avoid using so many accessories that you lose sight of the goal: The food should always be the star."1 The Institute of Culinary Education: "Remove dirty dishes, crumbs and other detritus that can detract from the photo."64 For a straight-on shot, Serious Eats wants "something in the background like a wall or a board to block out unwanted items in your kitchen."1
- A surface and a plate that helpSerious Eats: "Tablecloths, placemats, and slabs of stone are all also great alternatives to your kitchen table or countertop." On plates: "It's also easier to work with a salad-size plate rather than a full-size dinner plate".1 Shapes and finishes are in types of plates; plate colour in color on the plate and the plate color pairing tool, which reads the food colour from a photo in the browser without uploading it.
- Upright or sideways"consider how you'll be using the images and what orientation you need."64 Pinterest tells advertisers: "Most people use Pinterest on mobile devices, so aim for a vertical 2:3 aspect ratio."71 Darina Kopcok's insurance: "Shoot a bit wide so you can tweak your composition in post-production!"68
Glare, shine and reflections
- What a specular highlight isSunny Shrestha, summarising a Joanie Simon video for PictureCorrect: "Specular highlights are the result of direct reflection. They're formed when the light bouncing off the subject is bright and not diffused."18 Simon's own book (snippet): "It's a mirror reflection that's just as bright as the main light source."73
- Some on the food, none on the cutleryThe same summary says to avoid them on silverware and to "try to add some specular highlights on the food to make them appear more appetizing." Simon, quoted there: "You don't want your food to start looking greasy or oily."18 Corinna Gissemann's book (snippet) names the fault at the far end: "burned-out highlights that show no detail at all."76
- A larger, softer light gives softer reflectionsDunja Đuđić Kalinin, summarising another Simon video: "First, use a large, diffused light source to make the light reflections as soft as they can be."19
- Then move the light, the plate or the spoon"Sometimes, you can simply change the angle of light and avoid having a direct reflection in the photo." For cutlery: "Slightly tilt it or move it", or block its light with "a simple piece of black foamcore."19 Nikon UK: "Move the dish around to see how the light hits individual elements on the plate differently."5 B&H notes that "glassware and polished utensils require more specific lighting to avoid hot spots or reflections" and leaves it there.7
How to photograph steam, and whether to
- Light it from behind and to one sideDarina Kopcok: "You can use side backlighting when shooting a steam shot. You need the light to shine through the steam in order to capture it effectively."14
- Put something dark behind it"Steam is very light in color and somewhat transparent. It won't show up unless the backdrop adds some contrast."14 Andrew Scrivani's book (snippet) gives the same reason for his usual "side-lit, dark black background": "it is the best way to create contrast to capture steam and smoke rising off of food."75
- Be set up first: added steam goes in secondsKopcok adds her steam to the set (she suggests a handheld garment steamer) and says of it: "The few seconds it takes for you to place the steam and press the shutter can result in a complete loss of steam." With a camera, she starts at "1/200th of a second shutter speed", her figure.14
- The opposite advice, and what one study foundAdobe: "Hot steam can negatively impact your lighting and shadows, so consider letting a hot subject cool before starting your shoot".11 And in three online experiments published in 2024, animated steam added to food images raised desirability and freshness ratings, while "implied animation (i.e., static picture of rising steam) did not produce any such effect."88 A second paper from the same group found that steam added to the pictures on ready-meal packaging raised perceived temperature and freshness.89 Its abstract does not say whether that steam was still; if it was, the two results disagree (our reading).
Editing food photos: the adjustments, app by app
The first column is what named photographers adjust; the others are what Apple Photos, Google Photos, Snapseed and Lightroom on mobile call it on the help pages we could read. A cell says so when a page was not read. Apple's names are from its Photos guide for Mac, which prints the full list;45 the iPhone guide names only Exposure, Brilliance and Highlights as examples,44 so on an iPhone treat the other names as what to look for, not as confirmed labels.
| Adjustment | Who does it | Apple Photos (names from the Mac guide) | Google Photos | Snapseed | Lightroom |
|---|---|---|---|---|---|
| Straighten and crop | Darina Kopcok, first of all: "do any necessary cropping and straightening."68 | Photos can "further align shots and adjust horizontal and vertical perspective."35 | Straighten, Perspective, Aspect ratio.53 | Not on the Tune Image page read. | Not on the page read. |
| White balance | Serious Eats clicks a neutral white or gray;1 Shawn Chippendale looks "at what should be white."66 | On the Mac, Cast: "Adjusts and corrects for color casts."45 The iPhone guide names no white balance slider.44 | Warmth.53 | Warmth: "Add a warm or cool color cast to the entire image."54 | "Temp: Determines the image's warmth or coolness." "Tint: Adjusts the balance between green and magenta tones."55 |
| Brightness | Shawn Chippendale: apps "will usually prompt you to edit certain key things first, like the exposure and other brightness levels."66 | Exposure and Brilliance, both named in the iPhone guide;44 the Mac guide defines Exposure ("Adjusts the lightness or darkness of the entire image.") and adds Brightness.45 | Brightness.53 | Brightness: "Darken or lighten the entire image."54 | The Light panel's help page could not be opened. |
| Highlights and shadows | Serious Eats: "aim to preserve any detail on both the light and dark ends of the spectrum."1 | Highlights (named in the iPhone guide);44 on the Mac also Shadows and Black Point, which "can improve the contrast in a washed-out image."45 | Not named on the page read. | Shadows, Highlights, and Ambiance: "A twist on contrast, adjust the balance of light in the entire image."54 | The Light panel's help page could not be opened. |
| Contrast | "a little contrast".66 More is not always better: see the cake experiment. | Contrast (Mac guide).45 | Contrast.53 | Contrast.54 | The Light panel's help page could not be opened. |
| Colour strength | Darina Kopcok: Vibrance "lets you subtly boost the colors without creating a garish effect"; with Saturation "it's easy to quickly overdo the saturation and make your image look ugly." 68 | Saturation ("Adjusts the overall color intensity.") and Vibrance (Mac guide).45 | Saturation.53 | Saturation: "Add or remove vibrancy to the colors in the image."54 | "Vibrance: Enhances or reduces the intensity of muted colors while preserving skin tones." Also Saturation.55 |
- An order to work inDarina Kopcok's order, written for desktop Lightroom: crop and straighten, lens corrections, white balance, exposure and contrast, then clarity and colour, the tone curve, noise and vignette, and "Sharpening should always be your last editing step." Sharpening "won't take a blurry image and make it sharp."68 For a phone, Shawn Chippendale's order is in the short answer.66
Getting the plate ready for the camera
- Set the scene before the food is readyShawn Chippendale: "The scene needs to be ready before the food is ready."66 Stuart Ovenden: "Try to get your composition in place in advance so that you can concentrate on the food when it's ready to photograph".70 Donna Crous: "use a stand-in ingredient while you set up your scene or camera settings, before adding the dish."6
- Work fast; how fast has one figure, and it is an assertionStuart Ovenden: "the longer your dish hangs around, the more it starts to look tired and un-appetizing."70 The only window in minutes our research found is Dennis Davis in Shutterbug, 2004: "Within 1-3 minutes after putting a beautiful plate on a table to shoot, whip cream runs, wet food dries, fried food becomes greasy, ice cream melts, and steaming food doesn't." 15 That is one studio photographer's statement, not a measurement, and it is about commercial sets.
- Leave rim showingFood stylist Jennifer Joyce: "Don't overload your plate or serving dish." "Always show a fair amount of rim when plating up."69 Wiping the rim clean before the picture is ours; the method is in Plating 101.
- Herbs last, oil where it has driedJennifer Joyce on herbs: "Always add to your food at the last minute to keep them springy and fresh."69 Stuart Ovenden: meat "will benefit from a light brush of oil, but be careful not to overdo it otherwise it'll start to look greasy."70 What else to do to the food itself is in food styling.
The plate itself is covered elsewhere: food styling for gloss and freshness, Plating 101 and how to plate food for composition, steak and salad dish by dish, garnishes and plating tools.
Want to see your own plate re-plated?
Re-plate your dish free →Upload a photo of a plate you made. Once a day, watermarked, no sign-up.
What the research says about food photos, and what it does not
Each row gives the design, the people and the limits. Most of this work is about looking at food pictures or eating under coloured room light; very little is about how a photograph was lit.
| Study | What was done | What it found | Limits |
|---|---|---|---|
| Spence and colleagues, 2016 | A narrative review in Brain and Cognition: no new data and no participants.79 | Its authors write of "what we call 'visual hunger'" and review "cognitive neuroscience research demonstrating the profound effect that viewing such images can have on neural activity, physiological and psychological responses, and visual attention, especially in the 'hungry' brain."79 | The authors ask, rather than show, whether constant exposure to such images increases our desire for food.79 A 2011 meta-analysis of the brain-imaging work found only moderate agreement: "at best 41% of the experiments contributed to the clusters".96 |
| Ueda, Spence and Okajima, 2020 | A small augmented-reality experiment (13 students per test): people looked at real cake and ketchup through a headset that changed only the spread of light and dark tones on the food, keeping colour and average brightness the same.80 | That alone changed how moist, watery and delicious the food was expected to be, and some ratings after tasting.80 | Effects were small, were significant only between the two extreme settings, and for cake the higher-contrast version looked drier and less delicious. The study did not test darker images, photographs or freshness.80 |
| Wada and colleagues, 2010; Arce-Lopera and colleagues, 2012 | Small rating studies of cropped photographs of raw produce as it aged: nine people and one cabbage;81 ten people, then six, and one strawberry.82 | The pattern of light and dark tones in the patch went with how fresh it was judged;81, 82 in the strawberry study, changing the pattern changed the judgement.82 | The cabbage authors say the pattern "partly contributes" and that "other variables, such as spatial patterns, might also be important".81 One sample of each food; our research found no such study of a cooked, plated dish. |
| Room light on real food: Hasenbeck 2014, Cho 2015, Shu 2025 | People looked at or ate real food under coloured or dim room light: bell peppers;83 a breakfast eaten by 112 people;84 an 18-person study its authors call preliminary.85 | Liking of the peppers' appearance rose most under yellow light and least under blue, and "a dark condition" lowered it against a bright one.83 At the breakfast, "Blue lighting decreased the hedonic impression of the food's appearance, but not the willingness to eat". 84 In the 18-person study appetite was highest "under 2700 K warm white light".85 | Real food under room light, not photographs. At the breakfast, flavour and overall impression "were not significantly different among the three lighting colors."84 The pepper paper's abstract gives no sample size.83 |
| Liu and colleagues, 2022 | Two experiments with food images; the outcome was stated purchase intention, read here as an abstract.86 | "food images presented with high (vs. low) color saturation can effectively boost consumers' purchase intention."86 | The advantage "is attenuated when a food item appears visually proximal or when social consumption is anticipated": weaker for close-ups and shared meals. No sample sizes in the abstract.86 |
| Peng and Jemmott, 2018 | 399 US online workers each reacted to a batch of food photographs in a mock news feed and rated 15 more, drawn from a set of 300; each photograph was rated about 20 times.87 | "colorfulness did not increase an image's aesthetic appeal and likelihood of getting likes or comments"; red and orange hues and colour variety counted for more than intensity.87 | Small coefficients, and "once participants' ratings were controlled, computer vision features generally had negligible effects".87 |
| Photographing your own meal: Yong, Tong and Liu, 2020 and 2021; Coary and Poor, 2016 | A lab study in which participants were randomly assigned to photograph their food or something that was not food before eating;90 a week-long follow-up of 71 young adults with a no-phone condition;91 three marketing studies.92 | The evidence is mixed. A 2020 lab study found no evidence that photographing the food, as against photographing something else, changed how much people ate or how much they enjoyed it, and a week-long follow-up by the same team found no effect on enjoyment.90, 91 Earlier marketing experiments found the opposite for indulgent food: taking the picture first raised taste ratings.92 Our research found no study showing that a quick photo spoils a meal. | The lab study compared a food photo with a non-food photo, not a photo with none, and its abstract gives no sample size.90 In the follow-up, amounts and enjoyment were self-reported, and its intake result was not a clean null: the usual rise in the amount eaten from breakfast to dinner was absent at meals where the food was photographed.91 |
| Zellner and colleagues, 2014, 2011 and 2010 | A restaurant study over two nights, and earlier studies by the same group; all read as abstracts.93, 94, 95 | In a restaurant study, diners liked the same chicken dish more on the night it was plated in the more attractive of two equally neat arrangements.93 Earlier work by the same group found neatly plated food was liked more than the same food plated messily, apparently because neatness signals care.94 | A 2010 study by the same group found that a more attractive plate did not change liking for the flavour.95 The restaurant study is one restaurant, one meal, two nights.93 |
What our research did not find. No peer-reviewed study that compares side light with back light, daylight with lamp light, or overhead with three-quarter and straight-on views for photographs of plated food, and none that varies only the brightness of a food photograph. The only direct comparisons our research found, of one light direction with another and of an overhead view with a three-quarter view, are two student theses, which this page does not cite. So the lighting and angle advice above is practice, not science.
Food photography tips in reverse: the mistakes the sources name
- Two kinds of light at onceA window plus a kitchen lamp makes "adjusting the white balance nearly impossible."1 See mixed light.
- Direct sun on the plateAnthony Leo: "Direct sunlight can be harsh, causing subjects to look overexposed and washed out".3
- A close three-quarter shot with the wide lensFood at a three-quarter angle on a phone "can appear as if it's sliding off the table, due to the distortion caused by the lens."63 Rachel Korinek: "don't get too close to your subject."59 See lens choice.
- A tilted frameSerious Eats' caption: "The dreaded camera slant is disarming rather than appealing." 1
- Too much bowl"A mistake new food photographers make is that they often shoot too much bowl, and you can't see enough of the food inside of it."63
"Light is N percent of the photo", and other claims with no study behind them
A percentage for how much of a photograph is lighting is printed in several places, each with a different number and none with a source. Our research found no study behind any of them. Serious Eats ranks lighting first in words, with no number: "composition is second only to lighting when it comes to taking a good photograph."1
| The number | Who prints it | The words |
|---|---|---|
| 75% | Chef's Roll, 2015, in tips credited to photographer Caren Alpert | "While you may not realize it, photography is 75% lighting!"23 |
| 90% | Flavor365, 2025, by an author named only as "Silas" | A heading: "Tip 1: Master the Light (It's 90% of the Shot)".77 |
| 100% | V-Flat World, 2022, a photo-gear maker | "Your food photography will become 100% more appealing with good light as the foundation."22 |
| 70% | Cinematographers on a mailing list, about their own working time | "Perhaps 70% or more of my time is to lighting before the first take." The thread opens: "This is not meant to be 'scientific'".78 |
- "Natural light is always better."Our research found no study of it, and many professionals use lamps. Donna Crous: "many professional food photographers prefer to shoot using artificial light to ensure a uniform look throughout their images."6 Serious Eats wrote in 2019 that most of its pictures were shot with a softbox.1
- "Never use flash."True of a built-in flash fired straight at the food. Serious Eats, which says "Don't use it" of the built-in flash, also says a hotshoe flash can work when it is bounced off something big and white, and the Institute of Culinary Education's article suggests a flash with a diffuser: see above.1, 3
- "There is one best angle."The sources say the dish decides. Gastrostoria: "There is no best angle. There is simply the angle that works for the food you're shooting."63 Our research found no peer-reviewed comparison of overhead, three-quarter and straight-on photographs of plated food.
- "Steam makes the photo."Not shown for a still picture. In the direct comparison a static picture of steam "did not produce any such effect",88 and Adobe's page would rather let the dish cool.11 Both sides.
- "More contrast and more saturation always look tastier."Mixed. In one small headset experiment that changed only the spread of light and dark tones on real cake, the higher-contrast version looked drier and less delicious.80 In two experiments, more saturated food images raised stated purchase intention, less so for close-ups,86 and overall colourfulness did not raise appeal in rating data.87
- "Photographing dinner ruins it."Our research found no study that shows it. A lab study found no evidence of a difference between photographing the food and photographing something else, a week-long study with a no-phone condition found no effect on enjoyment, and one paper found higher taste ratings for indulgent food: the studies.90, 91, 92
A good photo for a re-plate
Plate Artists re-plates a photo of a dish you made. The free demo takes a photo of a plate you made, with no account: one successful render per visitor a day, watermarked. With an account you get one free credit at sign-up; the re-plate keeps the food fixed (no ingredients added, removed or changed), shows the whole plate, and lets you pick the plate or leave it to "chef's choice".
What to upload. The demo page says of the photo: "The plate you used, the lighting and the mess around it do not matter." Its FAQ asks for "A dish you cooked, in focus, with the whole plate in the frame", adds that "Daylight helps the AI read the food", and says it is "not built for drinks, packaged food or photos with people in them." The upload tips in the studio read "Whole plate in frame", "Daylight or bright kitchen" and "Top-down or 45°", and warn against "Dim, blurry, extreme close-up". Ours: the lighting advice on this page is for the picture you keep, not a condition of the re-plate, and how the light in a photo changes the result has not been measured. If you post what you cook, there is more in Plate Artists for creators.
Your dish, plated like a chef's
Snap it, upload it, and get the composed version back, with the steps to recreate it at home.
Start free · 1 enhancement →Free account · 1 free enhancement · No credit card
Food photography terms, defined
| Term | Also called | Defined after |
|---|---|---|
| Key light | main light | Joanie Simon's book (snippet)73 |
| Fill light | no other name | Joanie Simon's and Corinna Gissemann's books (snippets)73, 76 |
| Bounce card | reflector | Serious Eats1 |
| Diffuser | no other name | Cambridge in Colour27 |
| Negative fill | black card | Rachel Korinek; Serious Eats1, 20 |
| Hard light | no other name | Cambridge in Colour27 |
| Soft light | no other name | Cambridge in Colour27 |
| Back light | backlighting | B&H; Sony7, 8 |
| Specular highlight | no other name | PictureCorrect, summarising Joanie Simon18 |
| White balance | no other name | Serious Eats; Shawn Chippendale1, 66 |
| Colour temperature | CCT, Kelvin | US Department of Energy29, 30 |
| CRI | Color Rendering Index | US Department of Energy29 |
| Exposure | no other name | Apple, Photos User Guide for Mac45 |
| Shallow depth of field | no other name | Serious Eats1 |
| Flat lay | overhead, bird's-eye view | Google Store; Gastrostoria50, 63 |
| Three-quarter angle | 3/4 angle, 45-degree angle | Gastrostoria; Darina Kopcok62, 63 |
Key light · main light
The main light on the food.
Fill light
Light that fills in the shadow areas and is a bit less intense than the main light; a reflector works like a subsidiary light source to provide it.
Bounce card · reflector
A white surface placed opposite the light source to bounce light back onto the food and fill in dark areas or shadows.
Diffuser
A larger translucent object placed between the subject and the light source, such as a white sheet or curtain over a window that gets direct light.
Negative fill · black card
A black card or board placed opposite the light to absorb it instead of bouncing it back, for a moodier picture.
Hard light
Light from a source that is small as seen from the subject, such as direct sunshine, which gives shadows with abrupt edges.
Soft light
Light from a source that is large as seen from the subject, or that has bounced off or passed through something diffuse, which gives shadows with gradual edges.
Back light · backlighting
Light that comes from behind the food, opposite the camera.
Specular highlight
A direct reflection of the light on a shiny surface, formed when the light bouncing off the subject is bright and not diffused.
White balance
The camera or editing setting that removes the colour cast of the light, judged by whether things that should be white look white.
Colour temperature · CCT, Kelvin
The colour of a white light as a figure in Kelvin: the US Department of Energy calls lower figures warm and higher figures cool, and says the figure describes the emitted light, not the objects it falls on.
CRI · Color Rendering Index
A scale from 1 to 100 that measures a light source's ability to render colours the same way sunlight does.
Exposure
The lightness or darkness of the entire image.
Shallow depth of field
A look in which the subject stands out against a blurred background; taken too far, it blurs the subject itself.
Flat lay · overhead, bird's-eye view
A photograph taken from directly above the table, which removes depth and suits scenes with several elements.
Three-quarter angle · 3/4 angle, 45-degree angle
A camera position between overhead and straight on: anywhere from 25 to 75 degrees in Gastrostoria's count, around 45 degrees above the food in Darina Kopcok's.
Food photography questions, answered
How do you photograph food with a phone?
Put the plate in soft light, by day near a window out of direct sun, and switch the room lights off. Light it from the side or from behind, not from where you stand, and keep the phone's flash off. Soften direct sun with a white sheet and stand a white card opposite the light. Choose the view for the dish: from above for flat food, at table level for tall food. Wipe the lens, tap the food to focus, set the brightness so the bright parts keep their detail, and hold still. Then straighten, fix the white balance and adjust lightly. Each step comes from a named source in the guide; Plate Artists did not shoot or measure anything for it.
What is the best lighting for food photography?
Soft light from one direction. Serious Eats says the very best light is indirect daylight, such as a shady spot on a sunny day or a window out of direct sun. Sources split on the direction: Rupa Nagamootoo, Donna Crous and Nikon's cheat sheet favour side light; B&H, Sony and Terence Carter favour back light. The sources that take a view on front light for food (Nicole S. Young, Donna Crous, Joanie Simon and Serious Eats) say to avoid it, and the phone's own flash is front light. Our research found no peer-reviewed study that compares them.
Is side light or back light better for food?
Photographers disagree, so it depends on what you want to show. Side light is described as defining texture and adding depth, and Nicole S. Young says it tends to prevent reflections on liquid surfaces. Back light rims the food, shines through leafy herbs and suits glazes and clear drinks, but the front can come out dark: Sony corrects that with exposure compensation and other sources with a white card in front. The Institute of Culinary Education's article advises against back light altogether, quoting Anthony Leo on how dark and hazy a backlit subject can look. Starting with side light is our suggestion for a beginner, not a finding.
How do you photograph food at night?
Use one light and make it large. Food Blogger Pro recommends a continuous LED panel behind a diffuser, placed behind or beside the food as a window would be, with the curtains closed and the overhead lights off so that it is the only light. The Institute of Culinary Education suggests a flash or LED with a diffuser such as an umbrella or softbox. Add a white card opposite the light. Food Blogger Pro's figures for the lamp are daylight balanced, 5200 to 5600 K, and a CRI of 90 or more; our research found no source that gives beginners a wattage.
How do you take good food photos in a dark restaurant?
Keep the flash off: Rebecca Hale of National Geographic says it looks harsh, and Stan Horaczek of Popular Photography that it annoys other diners. By day, ask for a table by a window. Steady the phone on the edge of the table or a glass, use a white napkin as a reflector, and take one or two shots. Then either correct the yellow cast, as Serious Eats does, or keep it for the mood, as photographer Grace Rivera suggests. The trick of a friend's phone torch held above the plate, with a napkin over it, comes from one Time Out article.
Should you use flash for food photos?
Not the phone's own flash or a camera's built-in flash: Serious Eats says it creates harsh reflections and glare, and Stuart Ovenden of BBC Good Food that light poured in from the front flattens the dish. Flash that is bounced or diffused is another matter: Serious Eats says a hotshoe flash can work if there is something big and white to bounce it off, and the Institute of Culinary Education's article suggests a flash or LED with a diffuser.
What is the best angle for food photography?
The one that suits the dish. Serious Eats shoots a flat pizza from directly above and a tall burger at eye level; the Institute of Culinary Education names overhead, side view and 45 degrees. On a phone the in-between view is disputed: Rachel Korinek, Darina Kopcok and Gastrostoria say a phone's wide lens distorts it and prefer overhead or straight on, while the Institute of Culinary Education says it works for a wide variety of foods, and Serious Eats suggests it for a tall dish of ice cream, neither with that caveat. The middle course, from Kopcok and Korinek, is to step back and use the telephoto lens or crop. Our research found no peer-reviewed study that compares the angles.
What iPhone settings are best for food photography?
From Apple's iPhone User Guide as read at iOS 27: set the Flash control to Off, because the default is automatic; turn on Grid and Level in Settings under Camera; tap the screen to place the focus and drag up or down next to the focus area to set the exposure; touch and hold until AE/AF Lock appears to keep both. Night mode turns on by itself in low light, and Apple suggests a tripod for it. Menus move between iOS versions and models, so check your own phone.
Should I zoom in or move closer?
It depends on the phone. B&H's 2017 advice was to avoid zooming, because most phone zoom was a crop that reduces resolution. Google's engineers wrote in 2018 that on the Pixel 3, zooming before the shot gives more detail than cropping afterwards. Moving very close with the main camera has its own cost: Rachel Korinek says a wide lens up close makes near objects look abnormally large. For a three-quarter view, Darina Kopcok steps back and uses the telephoto lens.
Should I use Portrait mode for food?
Sources differ. Rupa Nagamootoo and Google's store article recommend it for the soft blur behind the dish. Google's own engineers wrote of the 2017 Pixel 2 that with no face in the frame the phone relies on depth alone, which works well only within roughly a metre (about 3 ft). Apple says that on iPhone XR, iPhone SE (2nd generation) and later, and iPhone 16e, the rear camera must detect a person's face to take a Portrait mode photo at all.
What colour temperature or white balance is best for food photos?
There is no single sourced number. Authorities print different figures for daylight: Nikon's and Canon's camera presets use 5200 K, Cambridge in Colour gives 5000 to 6500 K, and Food Blogger Pro asks for a 5200 to 5600 K lamp. What the sources agree on is using one kind of light at a time, because mixed sources leave casts that are hard to correct, and then setting the white balance so that things that should be white look white.
Do I need special lights or equipment for food photography?
Not by day. The sources' kit is a window, something white to bounce light (posterboard, a napkin, a piece of card) and something to soften direct sun (a white sheet or baking parchment). After dark they use one LED panel or flash with a diffuser. For such a lamp Food Blogger Pro asks for a CRI of 90 or more; the US Department of Energy's 2012 fact sheet grades the 80s as good and the 90s as excellent, and does not mention food.
How do you edit food photos on a phone?
Lightly. Shawn Chippendale's order is exposure and brightness, then colour temperature, then a little contrast and perhaps some vibrance or saturation. Darina Kopcok, writing for desktop Lightroom, crops and straightens first, sharpens last, and warns that too much Clarity makes food look dry. Apple's iPhone guide names Exposure, Brilliance and Highlights among its adjustments; Google Photos lists Brightness, Contrast, Saturation and Warmth; Snapseed's Tune Image has Brightness, Contrast, Saturation, Ambiance, Shadows, Highlights and Warmth.
How do you photograph steam?
Light it from behind and to one side, against a dark background, and be set up before the food arrives. Darina Kopcok says the light has to shine through the steam, that steam will not show unless the backdrop adds contrast, and that the steam she adds to a set can be gone in the few seconds before the shutter is pressed. Adobe gives the opposite advice, to let hot food cool because steam can hurt lighting and shadows. In one set of online experiments from 2024, a still picture of steam did not make food more desirable and animated steam did; a second paper from the same group found that steam on pictures of ready-meal packaging raised perceived temperature and freshness.
Why does my food look worse in photos than in real life?
The sources point first to the light. Serious Eats explains that indoor light is quite yellow, that your eyes compensate automatically and that the camera's sensor does not, so the photo carries a colour cast; ordinary bulbs also give awkward shadows, says B&H. A phone adds a second cause: its main camera is a wide lens, and Rachel Korinek notes that up close it makes near objects look abnormally large. A smudged lens makes pictures hazy and dull, says Rupa Nagamootoo.
Does photographing your food ruin the meal?
The evidence is mixed. A 2020 lab study found no evidence that photographing the food, as against photographing something else, changed how much people ate or how much they enjoyed it, and a week-long follow-up by the same team found no effect on enjoyment. Earlier marketing experiments found the opposite for indulgent food: taking the picture first raised taste ratings. Our research found no study showing that a quick photo spoils a meal.
How do you photograph food for Instagram?
The same way as for anywhere else, then choose the orientation for where the picture will go: the Institute of Culinary Education's article says to consider how you'll be using the images and what orientation you need. Rachel Korinek notes that flat lays are popular on Instagram and that an overhead view avoids the perspective distortion of a phone's wide lens. Pinterest, for its own platform, tells advertisers to aim for a vertical 2:3 picture. This guide prints no Instagram size: check Instagram's own help page, because the supported shapes change.
What phone settings help with food photos on a Pixel or a Galaxy?
From the makers' help pages as read on 6 October 2026. On a Pixel, Google's help says Night Sight turns on automatically in low light in Photo or Portrait mode and stops working when the flash is on; gridlines are under More settings as Grid type; and on Pixel 4a 5G and later there are Brightness and Shadows sliders. On a Galaxy, Samsung's US page lists a Flash control, Grid lines, a Food mode that emphasizes the vivid colors of food and a Pro mode with exposure and white balance, and says the modes vary by model. Menus move between versions, so check your own phone.
What should you not do in food photography?
The mistakes the sources name: mixing two kinds of light, which Serious Eats says makes the white balance nearly impossible to adjust; using the phone's own flash; putting the plate in direct sun; tilting the frame, which Serious Eats calls the dreaded camera slant; and, for a bowl, showing too much bowl and not enough food, in Gastrostoria's words. On a phone, Rachel Korinek, Darina Kopcok and Gastrostoria add shooting close at a three-quarter angle with the wide lens.
The photographers, makers, authorities and papers behind this guide
Published how-tos, makers' help pages and manuals, quoted in their own words and not tried by Plate Artists; how each was read is under how this page was made and in each entry. Peer-reviewed papers are cited by DOI where the journal assigns one and were read in full or as abstracts, as each entry says. Dates are the ones each page prints or carries in its page data; "n.d." means it prints none. A hyphen stands in where a title prints a dash. Readings and conversions marked as ours are our own.
- The Serious Eats Team (2019). The Serious Eats Guide to Food Photography. Serious Eats, updated 4 November 2019; end credit: written in collaboration by Niki Achitoff-Gray, Vicky Wasik and J. Kenji Lopez-Alt; the live page blocks scripts, so it was read in the Internet Archive capture of 11 July 2026, linked here. web.archive.org
- Young, N. S. (2015). Food Photography: Back, Side, and Front Light. Nicolesy (nicolesy.com), published 20 July 2015. nicolesy.com
- Sale, C. (2026). Food Photography 101: How to Use Lighting to Take Great Pictures. Institute of Culinary Education, 13 January 2026; quotes Anthony Leo, Assistant Director of Social Media at the school; sentences outside quotation marks are the writer's. ice.edu
- Nagamootoo, R. (2025). Food photography with Rupa: Part 2 - Light it Right. ckbk, 21 May 2025; first-person text signed Rupa; the page data lists Susan Low as the poster. ckbk.com
- Nikon (2025). Take better food photographs with your Nikon Quickstart cheat sheet. Nikon UK, Learn & Explore magazine, dated 28 August 2025 in the page data; no personal author seen. nikon.co.uk
- Crous, D. (n.d.). Create Your Light: Food Photography at Home. Nikon USA, Learn & Explore, no date printed; headed "Featuring Donna Crous" and written in the first person; the live page blocks scripts, so it was read in the Internet Archive capture of 25 January 2025, linked here. web.archive.org
- Finnegan, L. (2021). Getting Started with Lighting for Food Photography. B&H Explora, dated 21 July 2021 in the page data; a camera retailer's article; read in the Internet Archive capture of 17 February 2022, linked here. web.archive.org
- Sony (n.d.). Lighting and Its Effects. Sony UK support, "Basic knowledge", no date or author printed; a camera maker's support article; read in the Internet Archive capture of 28 November 2023, linked here. web.archive.org
- Carter, T. (2015). Natural Light Food Photography - tips and techniques from a pro. Grantourismo Travels, dated 21 April 2015 in the page data, modified 5 June 2023. grantourismotravels.com
- Keller, A. (2021). Joanie Simon's Food Photography Tips. KaTom Learning Center, page heading "Take Better Food Photos with a Food Photographer's Tips"; dated 7 October 2021 in the page data, modified 5 May 2023; an interview, so only the words in quotation marks are Joanie Simon's; a restaurant-supply retailer's site; read in the Internet Archive capture of 22 September 2026, linked here. web.archive.org
- Adobe (n.d.). A beginner's guide to food photography. Adobe Creative Cloud, Photography, no date or byline printed (contributors Ben Long and Samuel Nute; quotes Sarah Aagesen); browser title "Food photography tips, tricks, and ideas - Adobe"; a software maker's page; read in Internet Archive captures of 8 February and 15 March 2026, the first linked here. web.archive.org
- Adobe (n.d.). Adjusting white balance settings to improve photos. Adobe Creative Cloud, Photography, no date or byline printed; quotes photographers Adam Long, Kenton Waltz and Grace Rivera; browser title "Surprising looks with white balance - Adobe"; read in the Internet Archive capture of 8 February 2026, linked here. web.archive.org
- Hale, R. (2016). 5 Tips for Photographing Food on Your Phone. National Geographic (The Plate), 11 February 2016. nationalgeographic.com
- Kopcok, D. (2019). How to Photograph Steam (Food Photography Tips). ExpertPhotography, dated 1 April 2019 in the page data, modified 19 August 2026. expertphotography.com
- Davis, D. (2004). An Insider's Look At Food Photography "If You Can Shoot Food, You Can Shoot Anything!" Shutterbug, 1 December 2004; a studio photographer writing about commercial shoots. shutterbug.com
- Food Blogger Pro (2023). Best Artificial Lights for Food Photography. Food Blogger Pro, dated 2 November 2023 in the page data, modified 29 March 2024; author given there as "Emily @ FBP". foodbloggerpro.com
- Lebendig, U. (2019). Diffusion: The Secret Ingredient to Fantastic Food Photos. PictureCorrect, dated 10 January 2019 in the page data, modified 22 April 2026; the writer's summary of a Joanie Simon video, which was not watched, so the wording is the writer's. picturecorrect.com
- Shrestha, S. (2019). Food Photography Lighting: Specular Highlights & Falloff. PictureCorrect, dated 14 June 2019 in the page data, modified 22 April 2026; the writer's summary of a Joanie Simon video, which was not watched; only the words in quotation marks are hers. picturecorrect.com
- Đuđić Kalinin, D. (2019). Don't let spoons ruin your food photography. DIY Photography, 28 February 2019; the writer's summary of a Joanie Simon video, which was not watched, so the wording is the writer's. diyphotography.net
- Korinek, R. (2016). How to Guide: Create Dark Food Photography (With Just a Box). Two Loves Studio, dated 1 September 2016 in the page data, modified 3 July 2024. twolovesstudio.com
- Waring, A. (2020). Photo hack: make a window diffuser for food photography at home. Digital Camera World, 1 April 2020. digitalcameraworld.com
- V-Flat World (2022). Top 10 Best Tips and Tricks for Food Photography. V-Flat World, dated 29 May 2022 in the page data; no author printed; a photo-gear maker's blog. vflatworld.com
- Chef's Roll (2015). 5 Tips to Better Photography. CHEFS ROLL, dated 8 July 2015 in the page data; the tips are credited to photographer Caren Alpert. chefsroll.com
- Itoh, M. (2006). How-To: Photographing Food In A Restaurant (and Elsewhere On The Road). Just Hungry, 18 June 2006; posted as "maki". justhungry.com
- Horaczek, S. (2013). How To: Take a Picture In a Restaurant Without Looking Like a Jerk. Popular Photography, dated 23 January 2013 in the page data. popphoto.com
- Reichek, A. (2016). Six tips for taking perfect Instagram food photos. Time Out United States, dated 12 May 2016 in the page data. timeout.com
- Cambridge in Colour (n.d.). Introduction to Portrait Lighting. Cambridge in Colour, no author or date printed; a photography tutorial written about portraits, used here for how the size of a light sets the edge of a shadow and for what counts as a diffuser. cambridgeincolour.com
- Cambridge in Colour (n.d.). Understanding White Balance. Cambridge in Colour, page heading "TUTORIALS: WHITE BALANCE"; no author or date printed (footer copyright 2005 to 2020); the table's values and labels sit in separate cells and are paired here in the table's own order. cambridgeincolour.com
- US Department of Energy (n.d.). Lighting Principles and Terms. Energy Saver, U.S. Department of Energy, no date printed; general lighting advice for homes, not photography; read in the Internet Archive capture of 1 January 2026, linked here. web.archive.org
- US Department of Energy, Building Technologies Program (2012). LED Color Characteristics (Solid-State Lighting Technology Fact Sheet). U.S. Department of Energy, January 2012, PNNL-SA-84900; a PDF fact sheet; it does not mention food. energy.gov
- Waveform Staff (2018). What is CRI? The ultimate guide to the Color Rendering Index. Waveform Lighting, dated 17 January 2018 in the page data, modified 4 November 2024; the technical blog of a company that sells high-CRI lamps. waveformlighting.com
- Nikon Corporation (n.d.). White balance (Z 30 Online Manual). Nikon online manual, no date printed; one camera's manual, so its preset figures are that maker's conventions. onlinemanual.nikonimglib.com
- Canon Inc. (n.d.). Canon : Product Manual : EOS-1D X Mark III : White Balance. Canon product manual, no date printed; the table is headed approximate colour temperature in Kelvin; one camera's manual, so its figures are that maker's conventions. cam.start.canon
- Apple (n.d.). iPhone camera basics. Apple Support, iPhone User Guide, no date printed; the guide's version selector read iOS 27 when the page was read on 6 October 2026; menus move between versions; the iOS 18 version of the same page lists different lens buttons. support.apple.com
- Apple (n.d.). Use iPhone camera tools to set up your shot. Apple Support, iPhone User Guide, no date printed; the guide's version selector read iOS 27 when the page was read on 6 October 2026; menus move between versions; several steps print an icon in place of a word, so those steps are paraphrased here. support.apple.com
- Apple (n.d.). Take Night mode photos with your iPhone camera. Apple Support, iPhone User Guide, no date printed; the guide's version selector read iOS 27 when the page was read on 6 October 2026; menus move between versions. support.apple.com
- Apple (n.d.). Take macro photos and videos with your iPhone camera. Apple Support, iPhone User Guide, no date printed; the guide's version selector read iOS 27 when the page was read on 6 October 2026; menus move between versions. support.apple.com
- Apple (n.d.). Take portraits with your iPhone camera. Apple Support, iPhone User Guide, no date printed; the guide's version selector read iOS 27 when the page was read on 6 October 2026; menus move between versions. support.apple.com
- Apple (2025). Use Portrait mode on your iPhone. Apple Support, published 27 February 2025. support.apple.com
- Apple (n.d.). Adjust HDR camera settings on iPhone. Apple Support, iPhone User Guide, no date printed; the guide's version selector read iOS 27 when the page was read on 6 October 2026; menus move between versions. support.apple.com
- Apple (n.d.). Change advanced camera settings on iPhone. Apple Support, iPhone User Guide, no date printed; the guide's version selector read iOS 27 when the page was read on 6 October 2026; menus move between versions. support.apple.com
- Apple (n.d.). Customize the Main camera lens on iPhone. Apple Support, iPhone User Guide, no date printed; the guide's version selector read iOS 27 when the page was read on 6 October 2026; menus move between versions. support.apple.com
- Apple (n.d.). Use advanced camera tools on iPhone. Apple Support, iPhone User Guide, no date printed; the guide's version selector read iOS 27 when the page was read on 6 October 2026; menus move between versions; the page describes iPhone 18 Pro models. support.apple.com
- Apple (n.d.). Edit photos and videos on iPhone. Apple Support, iPhone User Guide, no date printed; the guide's version selector read iOS 27 when the page was read on 6 October 2026; menus move between versions; it names only Exposure, Brilliance and Highlights as examples of the adjustments. support.apple.com
- Apple (n.d.). Adjust light, exposure, and color in a photo or video on Mac. Apple Support, Photos User Guide for Mac, no date printed; the Mac guide, used here because it prints the full list of adjustment names with a definition of each. support.apple.com
- Apple (2026). iPhone Troubleshooting Camera Issues. Apple Support, published 22 September 2026. support.apple.com
- Google (n.d.). Take photos in low light or at night on your Pixel phone or tablet. Google, Pixel Camera Help, no date printed (footer dated 2026); read 6 October 2026; several steps print an icon in place of a word, so those steps are paraphrased here; menus move between versions. support.google.com
- Google (n.d.). Take high quality photos on your Pixel phone or tablet. Google, Pixel Camera Help, no date printed (footer dated 2026); read 6 October 2026; each feature lists the Pixel models that have it; menus move between versions. support.google.com
- Google (n.d.). Change your Camera app settings. Google, Pixel Camera Help, no date printed; read 6 October 2026, when the page named Pixel 11 models; the address redirects to answer 2838995; menus move between versions. support.google.com
- Google (n.d.). Pixel Camera Tips to Make Food Photos Look Great. Google Store (Australia) magazine, no date or byline printed; a store article, not a help page; the address redirects to store.google.com/au/magazine/take-great-food-shots-with-pixel. store.google.com
- Samsung (n.d.). Camera modes and settings on Galaxy phones and tablets. Samsung US Support, no date found on the page; it names no One UI version and says the modes vary by model; read 6 October 2026. samsung.com
- Samsung (2024). What are the different camera modes and how do I use them? Samsung UK Support, updated 31 December 2024; it says the modes depend on the device and operating system. samsung.com
- Google (n.d.). Edit your photos. Google Photos Help (Android tab), no date printed; read 6 October 2026. support.google.com
- Google (n.d.). Tune Image. Google, Snapseed Help, no date printed; read 6 October 2026. support.google.com
- Adobe (n.d.). Adjust colors. Adobe Help, Lightroom on mobile, the date did not render in the capture; read in the Internet Archive capture of 9 September 2026, linked here; the matching help page for the Light panel could not be opened, so its slider names are not given on this page. web.archive.org
- Wronski, B., & Milanfar, P. (2018). See Better and Further with Super Res Zoom on the Pixel 3. Google Research blog, 15 October 2018; Google engineers describing one phone's zoom. research.google
- Levoy, M., & Pritch, Y. (2017). Portrait mode on the Pixel 2 and Pixel 2 XL smartphones. Google Research blog, 17 October 2017; Google engineers describing one 2017 phone. research.google
- Steiner, S. C. (2017). Smartphone Photography 101: Capture, Edit, and Share. B&H Explora, dated 2 October 2017 in the page data; a camera retailer's article; read in the Internet Archive capture of 2 July 2019, linked here. web.archive.org
- Korinek, R. (2017). What are the best angles to shoot food with your smartphone? Two Loves Studio, dated 14 December 2017 in the page data, modified 22 July 2022; she says in the post that she was still using an iPhone 5. twolovesstudio.com
- Korinek, R. (2019). 2 Types of Distortion That Can Harm Your Food Photos. Two Loves Studio, dated 19 March 2019 in the page data, modified 19 July 2022. twolovesstudio.com
- Korinek, R. (2016). The Secret to Finding the Hero Angle in Food Photography. Digital Photography School, dated 26 June 2016 in the page data, modified 26 November 2020; written for cameras with 60 to 105 mm lenses, not phones. digital-photography-school.com
- Kopcok, D. (2022). 5 Tips for Eye-Catching Smartphone Food Photography. Digital Photography School, dated 30 May 2022 in the page data. digital-photography-school.com
- Gastrostoria (2018). What's the Best Camera Angle for Food Photography? Gastrostoria, 30 June 2018; the byline is printed as "WebDev_M"; Gastrostoria is food photographer Darina Kopcok's site, but her name is not the byline on this page, so it is cited by the site's name. gastrostoria.com
- Sale, C. (2026). Food Photography 102: Use These Angles to Level Up Your Images. Institute of Culinary Education, 26 January 2026; quotes Anthony Leo; sentences outside quotation marks are the writer's. ice.edu
- Durand, F. (2011). Best Food Photography Tips From 3 Pro Photographers. The Kitchn, published 2 March 2011; interviews with Andrew Scrivani, Michael Natkin and Sabra Krock; read in the Internet Archive capture of 3 December 2024, linked here. web.archive.org
- Chippendale, S. (2020). Secrets to Smartphone Food Photography. Edible Houston, 12 November 2020. ediblehouston.ediblecommunities.com
- Nagamootoo, R. (2025). Food photography with Rupa: Part 1 - iPhone Settings & Setup. ckbk, 7 May 2025; signed Rupa; posted by Susan Low. ckbk.com
- Kopcok, D. (2022). How to Edit Food Photos in Lightroom (Step By Step). Digital Photography School, dated 2 February 2022 in the page data; written for desktop Lightroom, not a phone app. digital-photography-school.com
- Morgan, C. (2015). How to style food for photography - 11 top tips. olive magazine, published 29 September 2015; no byline is printed, and the author given here is the one the page data names (Charlotte Morgan); the standfirst names food stylist Jennifer Joyce as the source of the tips. olivemagazine.com
- Ovenden, S. (2012). How to photograph food. BBC Good Food, dated 3 February 2012 in the page data, modified 7 December 2024. bbcgoodfood.com
- Pinterest (n.d.). Creative best practices. Pinterest Business, no date printed; a platform's advice to advertisers; read 6 October 2026. business.pinterest.com
- Dujardin, H. (2011). Plate to Pixel: Digital Food Photography and Styling. John Wiley & Sons, Google Books record dated 12 May 2011; read only as Google Books search-inside snippets: page numbers unknown, the text around each snippet not seen, so every quotation here is brief and should be checked against the printed book; her clock hours for side light are garbled in the snippet and are not quoted. books.google.com
- Simon, J. (2021). Picture Perfect Food: Master the Art of Food Photography with 52 Bite-Sized Tutorials. Page Street Publishing, Google Books record dated 20 April 2021; read only as Google Books search-inside snippets: page numbers unknown, the text around each snippet not seen, so every quotation here is brief and should be checked against the printed book. books.google.com
- Young, N. S. (2015). Food Photography: From Snapshots to Great Shots (second edition). Peachpit Press, Google Books record dated 16 July 2015; read only as Google Books search-inside snippets: page numbers unknown, the text around each snippet not seen, so every quotation here is brief and should be checked against the printed book. books.google.com
- Scrivani, A. (2019). That Photo Makes Me Hungry: Photographing Food for Fun & Profit. The Countryman Press, Google Books record dated 26 November 2019; read only as Google Books search-inside snippets: page numbers unknown, the text around each snippet not seen, so every quotation here is brief and should be checked against the printed book. books.google.com
- Gissemann, C. (2016). Food Photography: A Beginner's Guide to Creating Appetizing Images. Rocky Nook, Inc., Google Books record dated 22 July 2016; read only as Google Books search-inside snippets: page numbers unknown, the text around each snippet not seen, so every quotation here is brief and should be checked against the printed book. books.google.com
- "Silas" (2025). 10 Tips for Stunning Food Photography. Flavor365 (eathealthy365.com), dated 4 July 2025 in the page data; the author is given only as "Silas"; browser title "How to Take Better Recipe Pictures"; cited only to show who prints the percentage, not as advice. eathealthy365.com
- Cinematography Mailing List (n.d.). How_Much_Of_The_Job_Is_The_Lighting. cinematography.net, no date printed; the title is the browser title of a forum thread kept on the list's site, whose posters are named in it; about film sets, not food. cinematography.net
- Spence, C., Okajima, K., Cheok, A. D., Petit, O., & Michel, C. (2016). Eating with our eyes: From visual hunger to digital satiation. Brain and Cognition, 110, 53-63; a narrative review with no new data; read as an abstract. doi:10.1016/j.bandc.2015.08.006 · PMID 26432045
- Ueda, J., Spence, C., & Okajima, K. (2020). Effects of varying the standard deviation of the luminance on the appearance of food, flavour expectations, and taste/flavour perception. Scientific Reports, 10, 16175; full text read; real cake and ketchup seen through an augmented-reality headset, 13 university students per experiment. doi:10.1038/s41598-020-73189-8 · PMID 32999406
- Wada, Y., Arce-Lopera, C., Masuda, T., Kimura, A., Dan, I., Goto, S., Tsuzuki, D., & Okajima, K. (2010). Influence of luminance distribution on the appetizingly fresh appearance of cabbage. Appetite, 54(2), 363-368; abstract read; nine participants rated cropped photographs of one cabbage. doi:10.1016/j.appet.2010.01.002 · PMID 20079392
- Arce-Lopera, C., Masuda, T., Kimura, A., Wada, Y., & Okajima, K. (2012). Luminance distribution modifies the perceived freshness of strawberries. i-Perception, 3(5), 338-355; full text read; ten observers in the first experiment and six in a later one, cropped photographs of one strawberry. doi:10.1068/i0471 · PMID 23145288
- Hasenbeck, A., Cho, S., Meullenet, J.-F., Tokar, T., Yang, F., Huddleston, E. A., & Seo, H.-S. (2014). Color and illuminance level of lighting can modulate willingness to eat bell peppers. Journal of the Science of Food and Agriculture, 94(10), 2049-2056; abstract read, which gives no sample size; real peppers under room lighting, not photographs. doi:10.1002/jsfa.6523 · PMID 24318125
- Cho, S., Han, A., Taylor, M. H., Huck, A. C., Mishler, A. M., Mattal, K. L., Barker, C. A., & Seo, H.-S. (2015). Blue lighting decreases the amount of food consumed in men, but not in women. Appetite, 85, 111-117; abstract read; 112 participants ate breakfast under white, yellow or blue room lighting. doi:10.1016/j.appet.2014.11.020 · PMID 25447013
- Shu, Y., Gao, H., Wang, Y., & Wei, Y. (2025). Food emotional perception and eating willingness under different lighting colors: A preliminary study based on consumer facial expression analysis. Foods, 14(19), 3440; full text read; 18 participants; the authors call it preliminary and exploratory. doi:10.3390/foods14193440 · PMID 41097608
- Liu, S. Q., Wu, L. L., Yu, X., & Huang, H. (2022). Marketing online food images via color saturation: A sensory imagery perspective. Journal of Business Research, 151, 366-378; abstract read, which gives no sample sizes; two experiments. doi:10.1016/j.jbusres.2022.06.061
- Peng, Y., & Jemmott, J. B., III (2018). Feast for the eyes: Effects of food perceptions and computer vision features on food photo popularity. International Journal of Communication, 12, 313-336; full text read; a set of 300 photographs and 399 US Amazon Mechanical Turk workers, each of whom rated 15 of them; the journal assigns no DOI. ijoc.org
- Zhang, T., Desebrock, C., Okajima, K., & Spence, C. (2024). 'Hot stuff': Making food more desirable with animated temperature cues. Food Quality and Preference, 120, 105233; abstract read, which gives no sample sizes; three online experiments. doi:10.1016/j.foodqual.2024.105233
- Zhang, T., Gao, Y., & Spence, C. (2024). Ready meals that look hot increase consumers' willingness to pay for plant-based options. Food Quality and Preference, 121, 105277; abstract read, which gives no sample sizes; pictures of ready-meal packaging. doi:10.1016/j.foodqual.2024.105277
- Yong, J. Y. Y., Tong, E. M. W., & Liu, J. C. J. (2020). When the camera eats first: Exploring how meal-time cell phone photography affects eating behaviours. Appetite, 154, 104787; abstract read; it gives 137 young adults for the first study and no sample size for the lab study. doi:10.1016/j.appet.2020.104787 · PMID 32579971
- Yong, J. Y. Y., Tong, E. M. W., & Liu, J. C. J. (2021). Meal-time smartphone use in an obesogenic environment: Two longitudinal observational studies. JMIR mHealth and uHealth, 9(5), e22929; full text read; in the second study 71 young adults were followed for three meals a day over 7 days; amounts and enjoyment were self-reported. doi:10.2196/22929 · PMID 33955842
- Coary, S., & Poor, M. (2016). How consumer-generated images shape important consumption outcomes in the food domain. Journal of Consumer Marketing, 33(1), 1-8; abstract read, which gives no sample sizes; three studies. doi:10.1108/JCM-02-2015-1337
- Zellner, D. A., Loss, C. R., Zearfoss, J., & Remolina, S. (2014). It tastes as good as it looks! The effect of food presentation on liking for the flavor of food. Appetite, 77, 31-35; abstract read, which gives no sample size; one restaurant, one meal, two nights. doi:10.1016/j.appet.2014.02.009 · PMID 24589740
- Zellner, D. A., Siemers, E., Teran, V., Conroy, R., Lankford, M., Agrafiotis, A., Ambrose, L., & Locher, P. (2011). Neatness counts. How plating affects liking for the taste of food. Appetite, 57(3), 642-648; abstract read, which gives no sample sizes; three studies. doi:10.1016/j.appet.2011.08.004 · PMID 21855585
- Zellner, D. A., Lankford, M., Ambrose, L., & Locher, P. (2010). Art on the plate: Effect of balance and color on attractiveness of, willingness to try and liking for food. Food Quality and Preference, 21(5), 575-578; abstract read, which gives no sample size. doi:10.1016/j.foodqual.2010.02.007
- van der Laan, L. N., de Ridder, D. T. D., Viergever, M. A., & Smeets, P. A. M. (2011). The first taste is always with the eyes: A meta-analysis on the neural correlates of processing visual food cues. NeuroImage, 55(1), 296-303; abstract read; 17 brain-imaging studies of food against non-food pictures. doi:10.1016/j.neuroimage.2010.11.055 · PMID 21111829
Keep going
Food styling
What to do to the food itself before the lens comes out: gloss, freshness and height.
Plating 101
The camera photographs the plating: the clock method, height, negative space and sauce work.
How to plate food, dish by dish
Pasta, salmon, chicken parmesan, lamb chops, rice and more, each shown before and after.
Color on the plate
The food color wheel, plate colour and the research on colour and taste.
Types of plates
Shapes, sizes and finishes, for choosing what the food sits on.
Re-plate a photo, free
Upload a picture of a plate you made and see it re-plated. One a day, watermarked, no account.